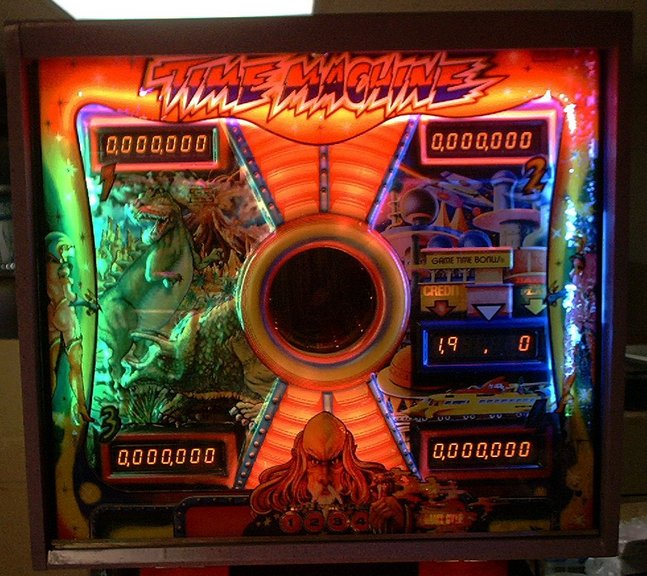
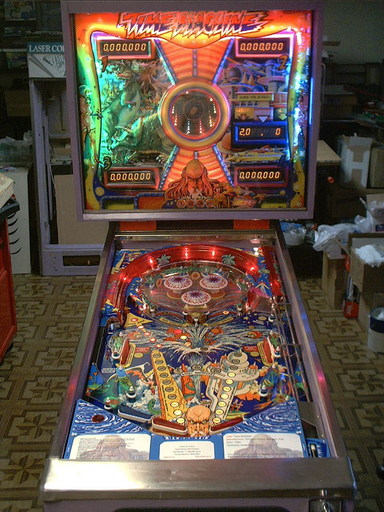
Ever since I first saw pictures of this game, I have loved the artwork on it. It is, in my opinion, one of the coolest looking games ever made. And with some unique features like a moving mini-playfield and four flippers (that you can't drain the ball between), it looked to me like it would be fun to play.
This was originally going to be a quick combination of the best parts of two games to make one, but turned in to a more extensive restoration project. I also decided to add an interesting little modification. The target date for completion: Pinball Expo 2006.
I started with one game. Reasonably complete as it came to me, just in the usual out-of-the-warehouse condition. I also picked up a partial game from another collector, so I had a total of two cabinets, two playfields, one backbox, and one set of boards. The plan was to use the better playfield, the better of the two cabinets, and build one nice game.
|
|
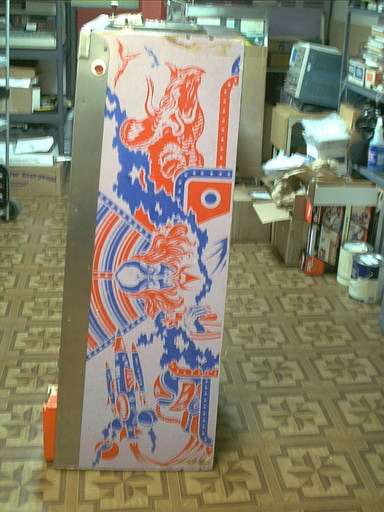
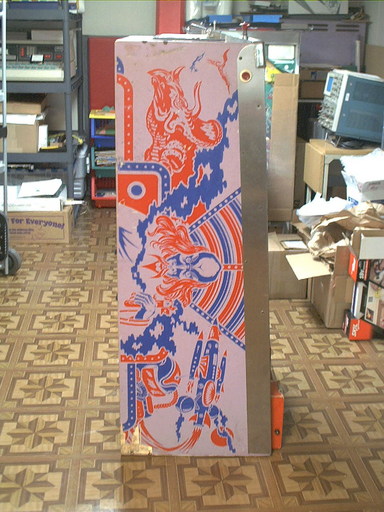
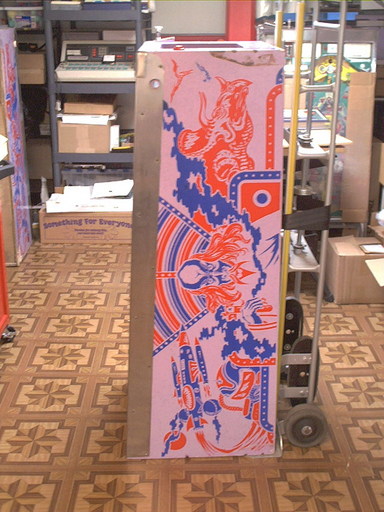
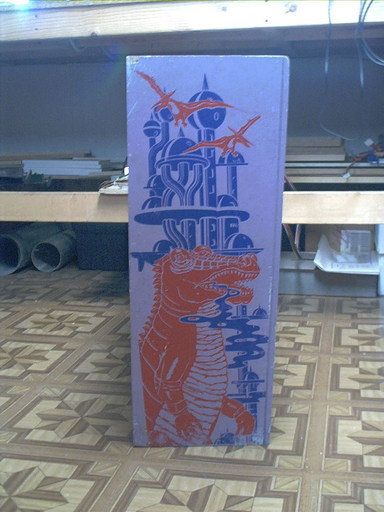
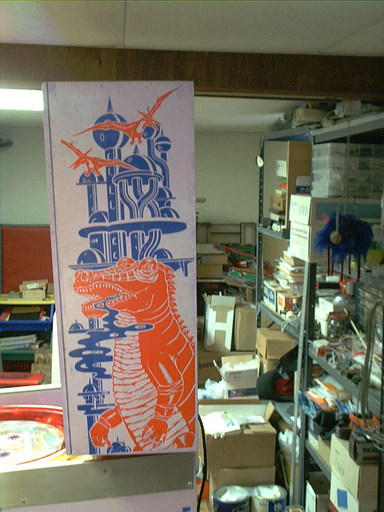
| Cabinet Left Side | Cabinet Right Side |
|
|
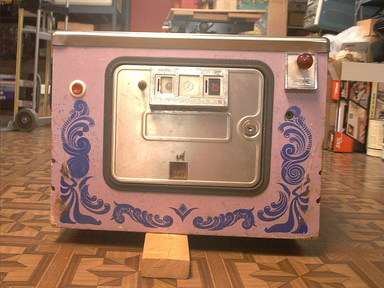
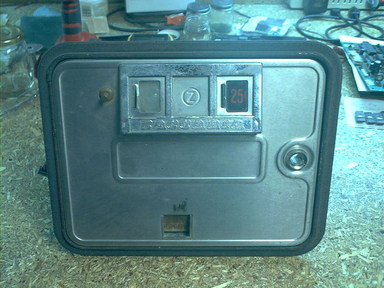
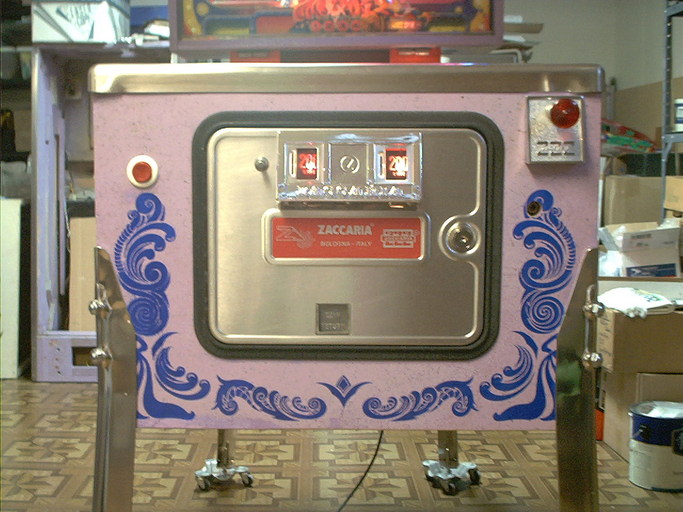
| Cabinet Neck | Coin Door and Plunger |
|
|
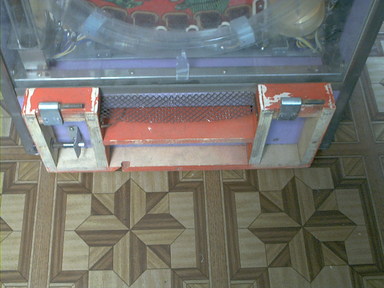
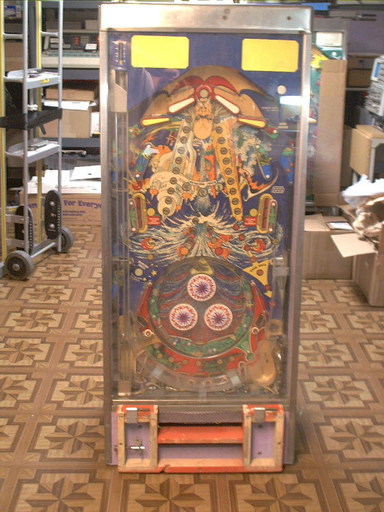
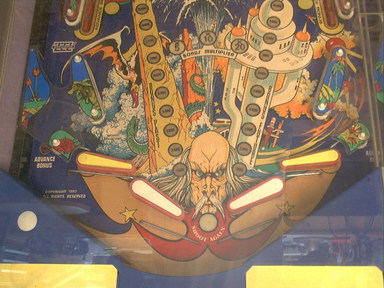
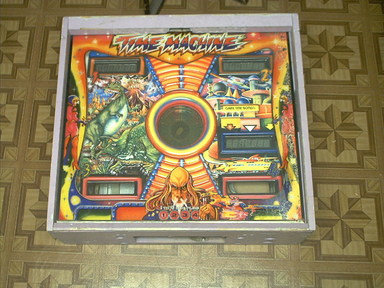
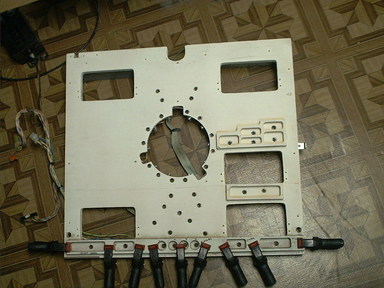
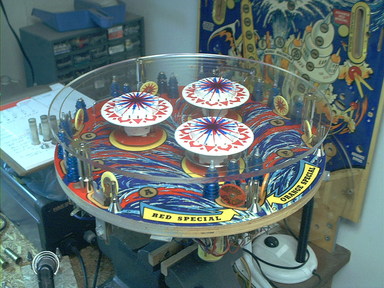
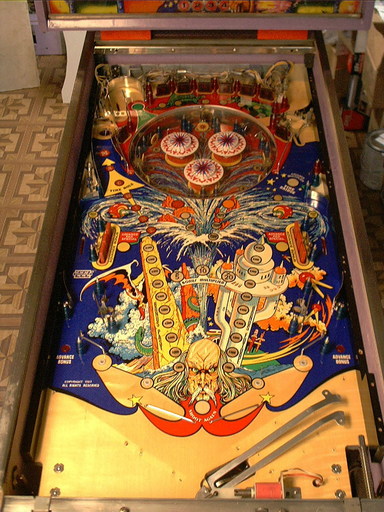
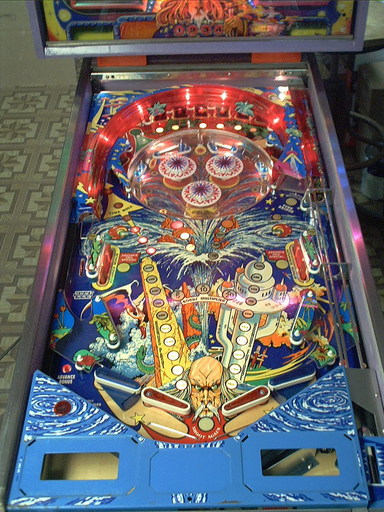
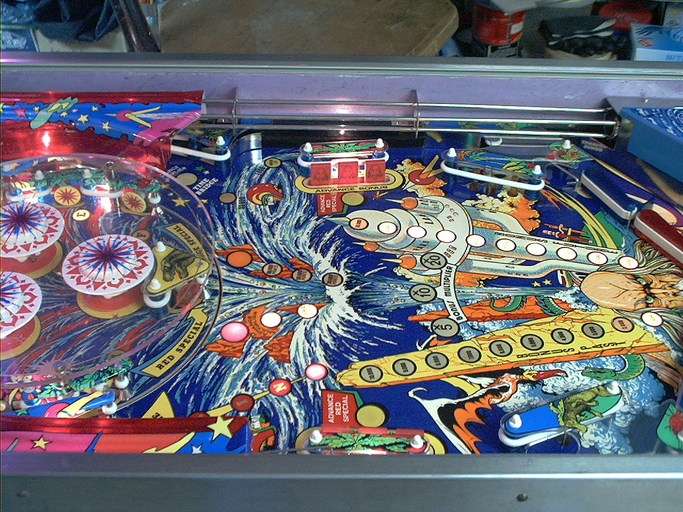
| Playfield Overall | Playfield - Flippers Closeup |
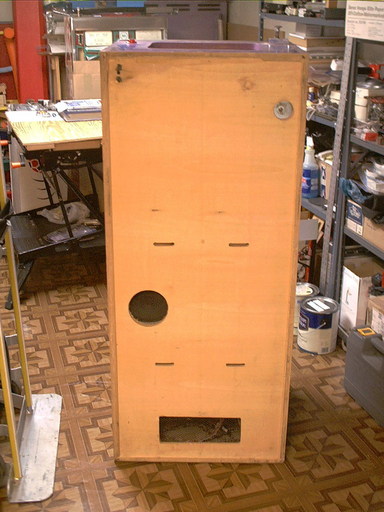
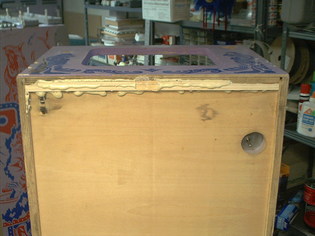
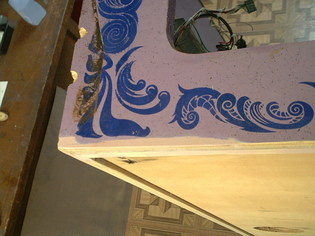
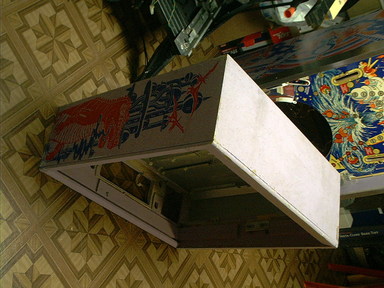
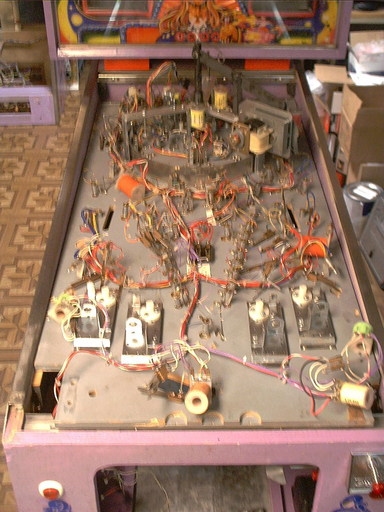
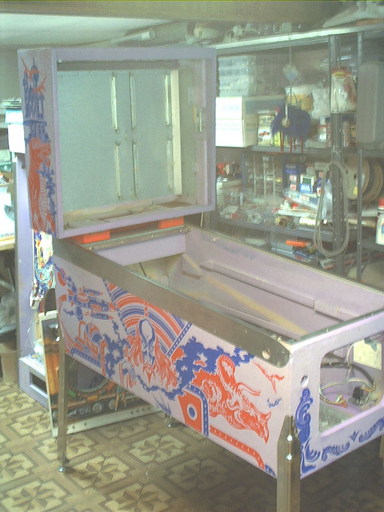
This is a solid starting point, the cabinet is in pretty good condition, except for that big chunk missing by the rear corner on one side. The neck is a bit beat up looking, but solid, and the coin door is complete. The only real problem is the playfield. Notice that somebody previously removed the correct "winged" flippers that should be there, and installed some Williams flippers in their place. That would not be a big deal, except that they also added wire ball guide rails behind the flippers. To use this playfield means removing these rails, filling and patching the holes, and touching up and at least spot clearcoating this area.
 |
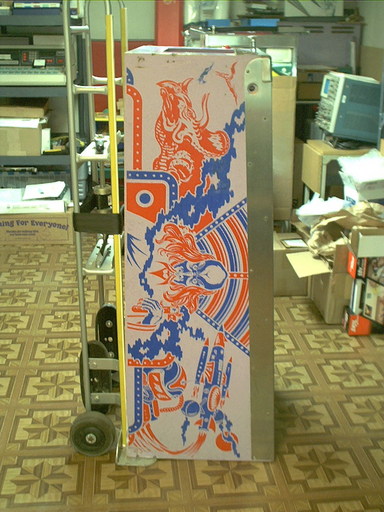 |
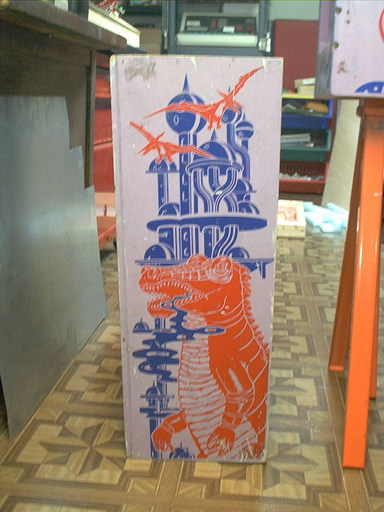
| Cabinet Left Side | Cabinet Right Side |
 |
 |
| Cabinet Bottom | No Coin Door and Wrong Plunger |
 |
 |
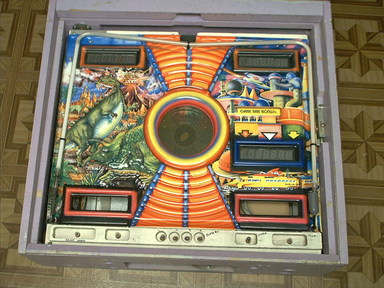
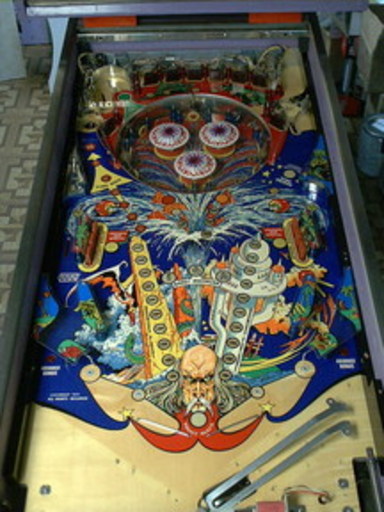
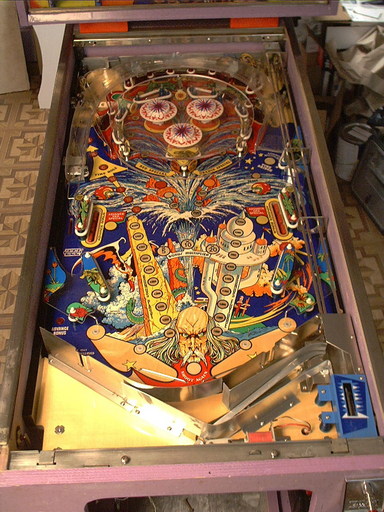
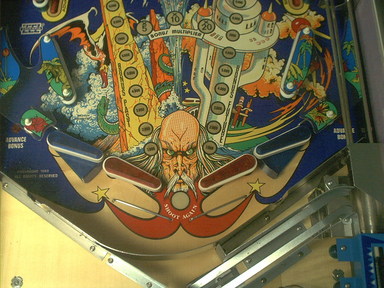
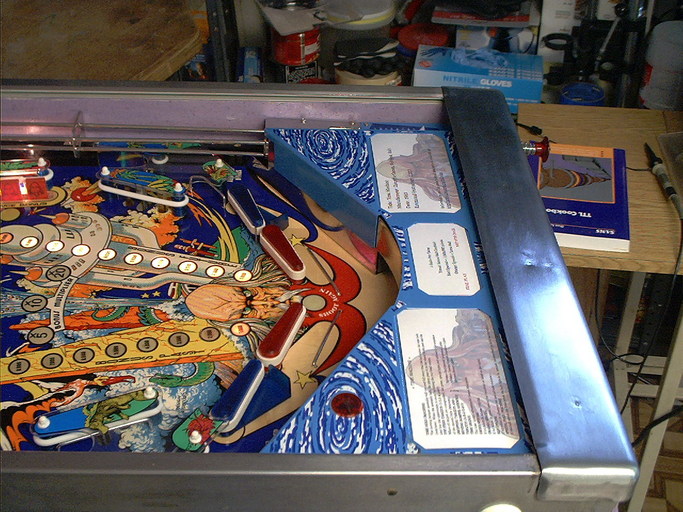
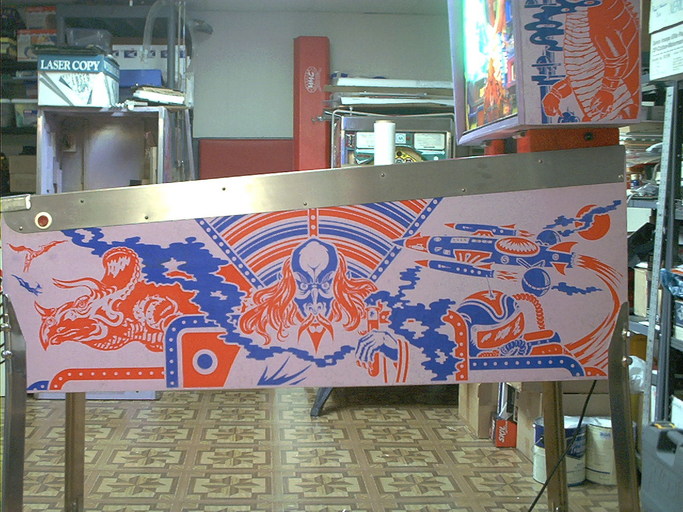
| Playfield Overall | Playfield - Flippers Closeup |
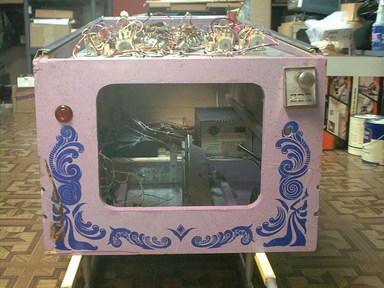
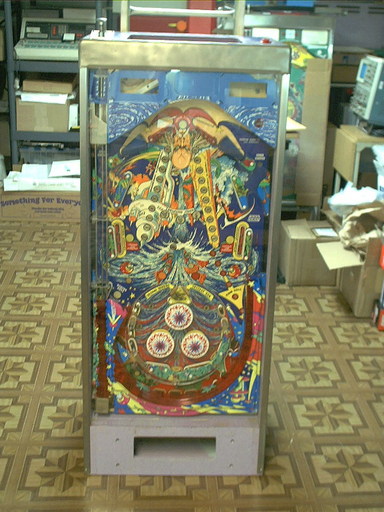
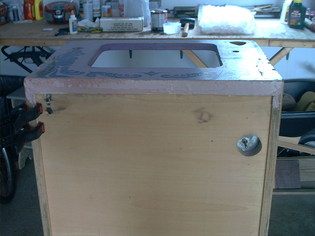
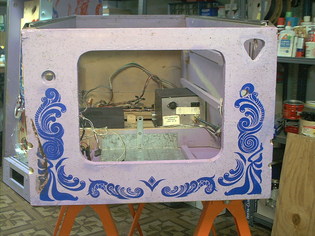
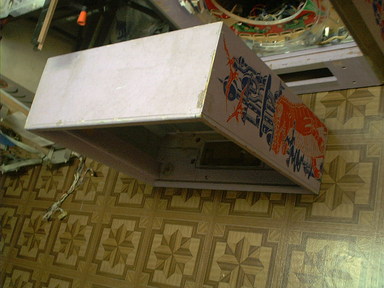
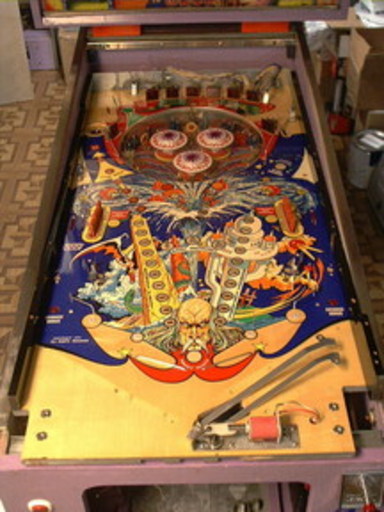
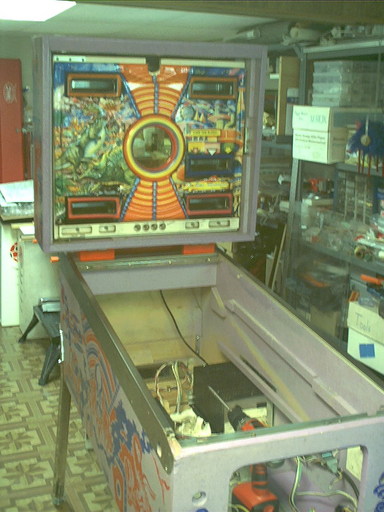
Here we have a cabinet with less visible damage, though the bottom of the plywood edges is bad in a few places, and a playfield without the extra ball guide rails added. It has a better score card apron, and some other advantages as well. But, no coin door, and a Williams metal-knob plunger instead of the correct translucent red plunger knob.
 |
 |
| Backbox Left Side | Backbox Right Side |
 |
 |
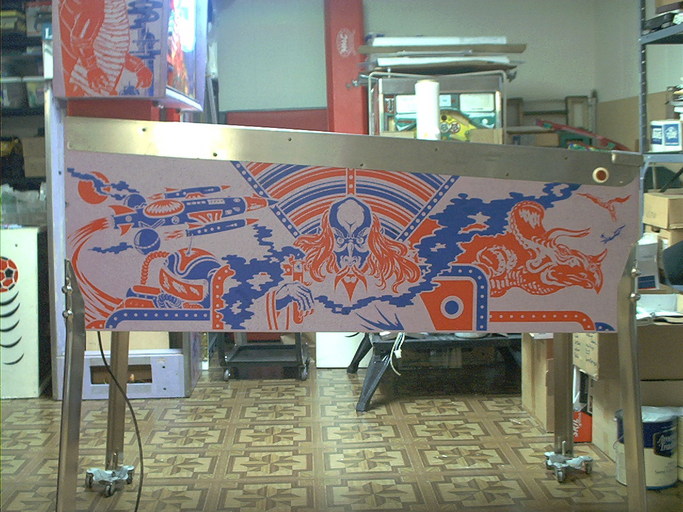
| Backbox Front | |
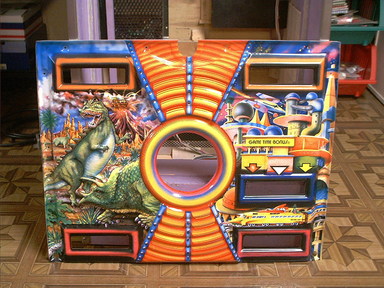
There are some scuffs and scrapes on the sides, and the front edges has some pretty heavy dings and dents, but overall, the backbox is in pretty good shape. The backglass has some flaking of the artwork, especially on the right side. The molded plastic is in good condition, and the neon tube is there.
 |
 |
| Cabinet Bottom Edge Being Repaired | Cabinet Bottom Edge After Gluing |
 |
 |
| Cabinet Bottom After Cleanup | Cabinet Bottom: Done |
 |
 |
| Cabinet Front Repair | Cabinet Front: Done |
 |
 |
| Cabinet Left: Done | Cabinet Right: Done |
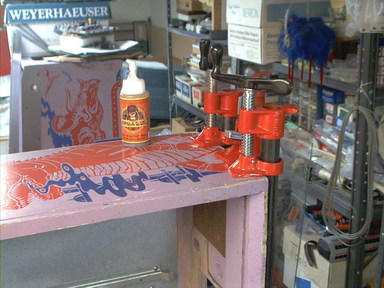
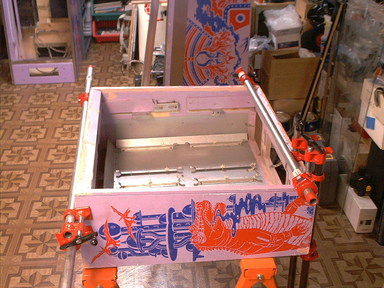
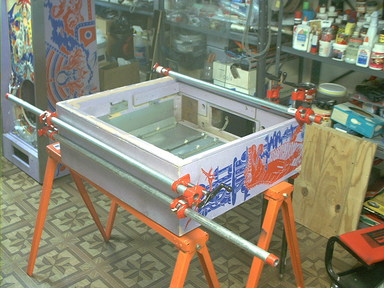
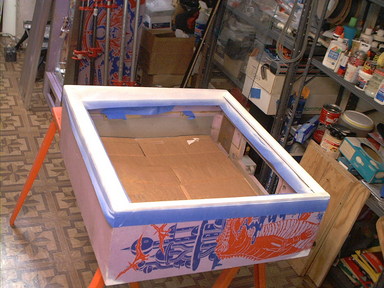
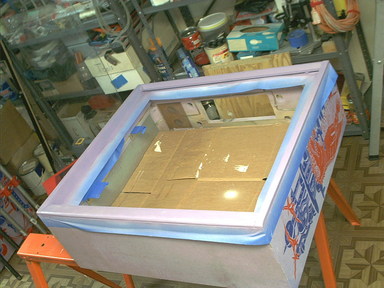
The bottom edges of the plywood sides of the cabinet had been damaged, but fortunately this is all hidden from normal sight so repairing it is not difficult. I ripped and glued some 3/4" trim in place of the missing plywood, used some Bondo to fill the gaps and holes, and planed and sanded the bottom edge smooth.
One part of the plywood on the cabinet front had been damaged as well. This was repaired with more Bondo and touched up to match the cabinet.
There were other nicks, gouges, and minor scrapes on the artwork, all of which were touched up (purple, blue, red) and blended in. The finished cabinet looks good and is ready to go.
 |
 |
| Backbox Left Side | Backbox Right Side |
 |
 |
 |
 |
| Repairing some loose joints | |
 |
 |
| Taping off the front trim and spraying white as a primer and to even out the colour. | |
 |
 |
 |
 |
| Spraying the purple colour top coat and later some Krylon Crystal Clear as a top coat. | |
 |
 |
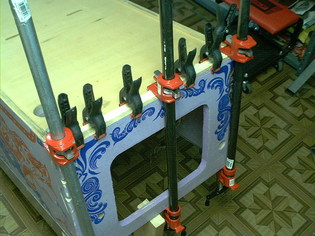
| Gluing and clamping the box around the lamps on the backbox door. | |
 |
 |
| Backbox Left: Done | Backbox Right: Done |
 |
 |
| Backbox: Done | |
 |
 |
| Backbox Plastic Insert | Backbox Door, Reassembled |
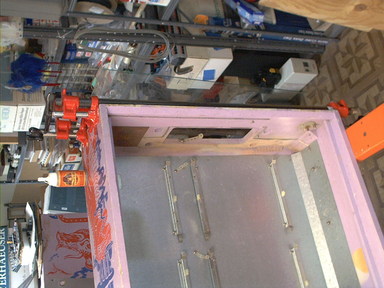
For the backbox, several of the wood joints were loose from age and abuse, so they were glued with Gorilla Glue and clamped. Several spots where the plywood was about to chip were also repaired with glue and clamps. There were enough dents, dings, scratches, and general damage to the front edge that I did not think that touchups would work, and since there isn't any artwork in the way, I decided to re-spray the whole area instead. The dents and dings were filled and sanded, then an undercoat of white was sprayed on. This was then top coated with a custom mixed purple that is pretty close to the original colour. Once the colour coats had dried, the area was spattered with thinned black paint using a toothbrush.
After this had dried, then the other touchups to the purple, red, and blue on the sides was done with small paintbrushes and mixing the colours on the fly on a pallette. The damaged and missing artwork was painted back in to place. Once that was complete, the touched up areas were sprayed with Krylon Crystal Clear as a final top coat.
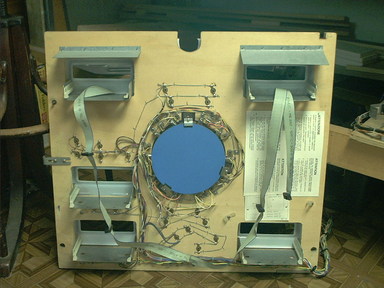
The inside of the backbox was cleaned, in preparation for reassembly. The backbox door was disassembled, the infinity lights assembly cleaned, and the moulded insert was washed. The wood frame around the lamps along the bottom of the door was loose, so it was glued and clamped.
 |
 |
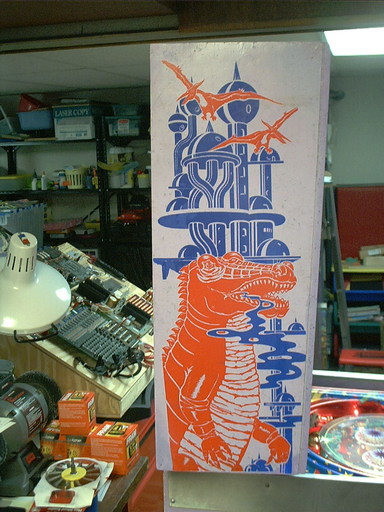
| Cabinet Neck... | Solid, but ugly. |
 |
 |
| Sanded down flakey paint to solid base. | Plywood splintered here - factory repaired with filler. |
 |
 |
| Repair missing plywood with Bondo. | Touching up dings and gouges with wood putty. |
 |
 |
| Sanded and ready for paint. | |
 |
 |
| Primered with Kilz Latex white primer. | Sprayed with a custom orange mix. |
 |
 |
| Spattered with black. Screen repainted. | Neck done, reassembled with cleaned up hardware. |
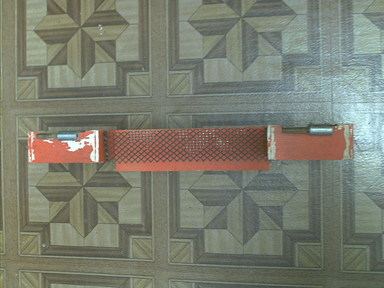
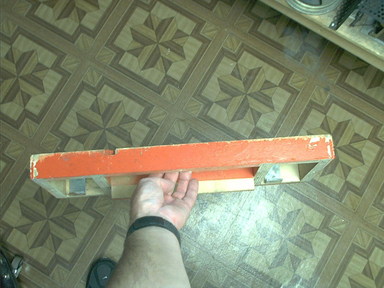
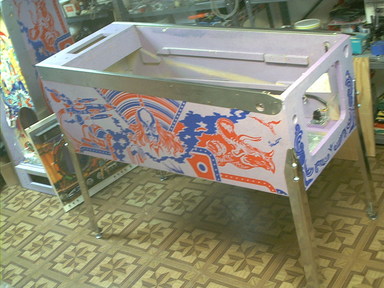
The cabinet neck was solid, but the paint on it was flakey and loose, and the metal screen was rusty. At least all the parts are there. I sanded off the loose paint, and found that the factory had filled a major chip in the plywood with filler, which was a surprise since it wasn't visible after painting. I re-repaired this with Bondo filler, and filled in the other dings and scratches with regular wood filler. Sanding the whole thing smooth and prepping it for paint was straightforward. I primered it with Kilz, and sanded that smooth as well, since the original finish is all sprayed and should be very smooth. I mixed some orange to approximate the colour it should be, based on some of my other games, and sprayed multiple coats to cover the neck. While those were drying, the screen was wire brushed and painted with Rustoleum black. Once the orange was dry, the neck was spattered with black using a toothbrush, and the whole thing was top coated with Krylon Crystal Clear to bring a gloss to it. The hardware was cleaned up, and the neck reassembled and made ready to back on the cabinet body.
 |
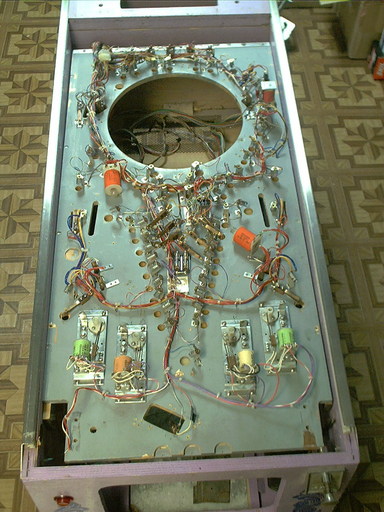 |
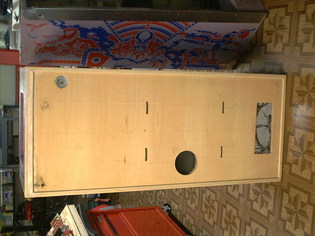
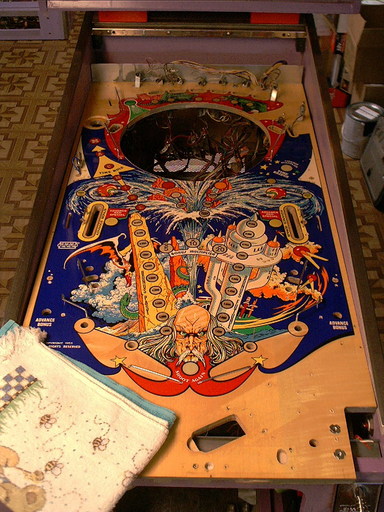
| Playfield - Top side | Playfield - Bottom side |
 |
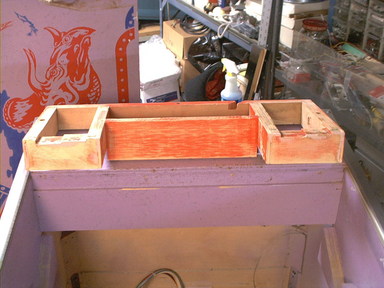
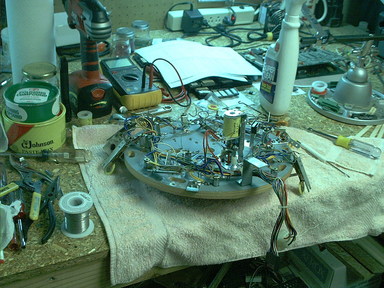 |
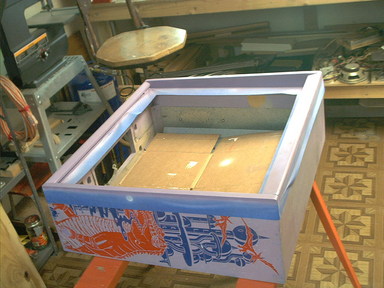
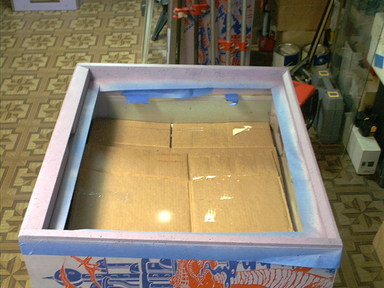
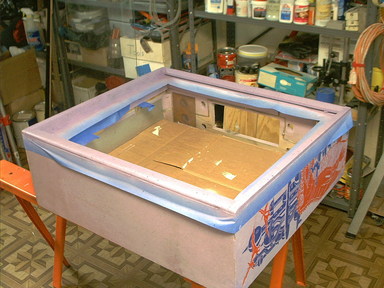
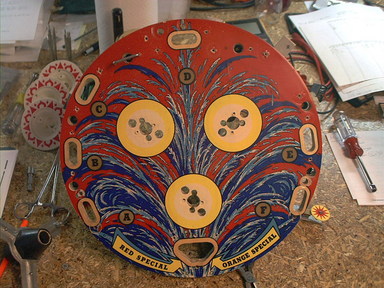
| Mini Playfield - Stripped | Mini Playfield being rebuilt |
 |
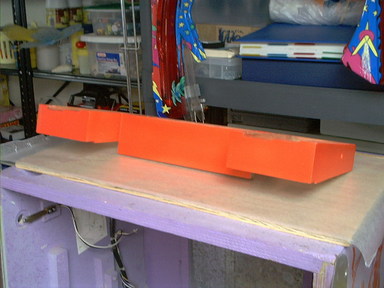
 |
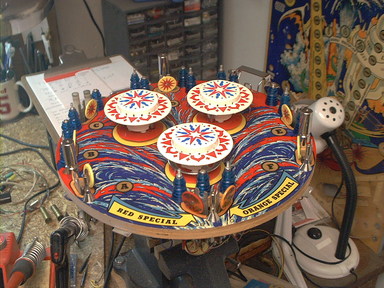
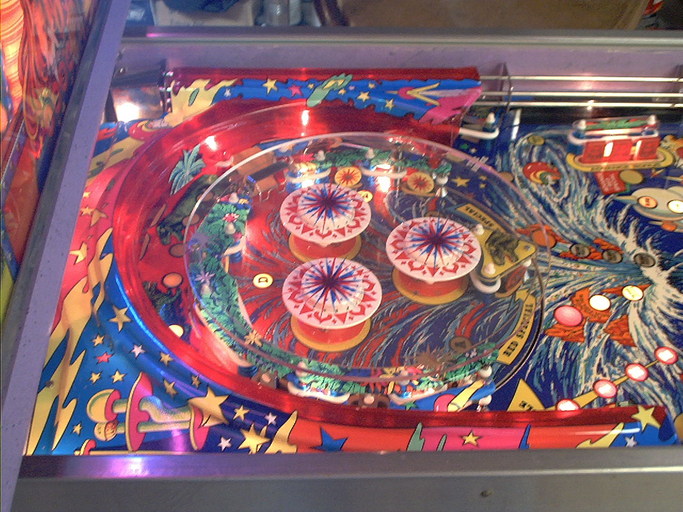
| Mini Playfield being reassembled | Mini Playfield: Done |
 |
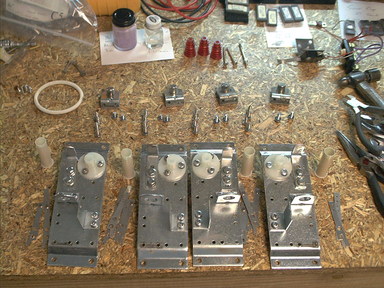 |
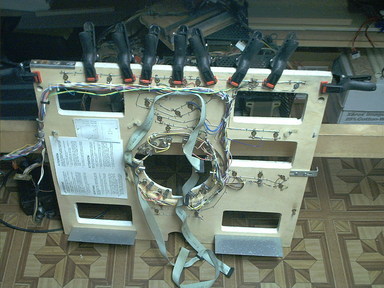
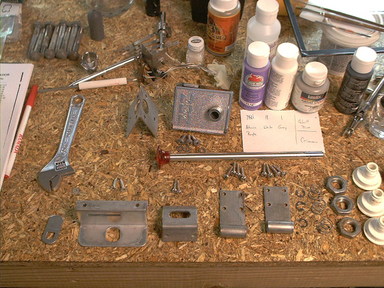
| Playfield sheetmetal parts | Flipper mechs being rebuilt |
 |
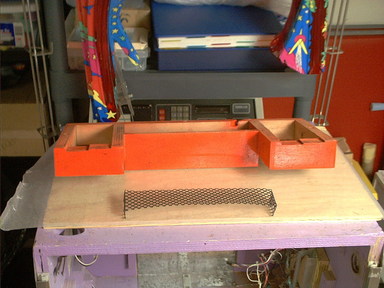
 |
| Playfield Cleaned and Waxed | Playfield reassembly underway |
 |
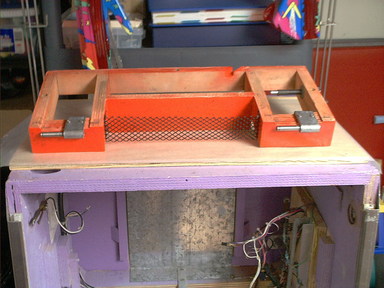
 |
| Rebuilding the drop target assemblies | Reinstalling the mini playfield assembly |
 |
 |
| Top side reassembly started | Top side - posts and ball guides |
 |
 |
| Plastics in place. | Ramps reinstalled. |
 |
 |
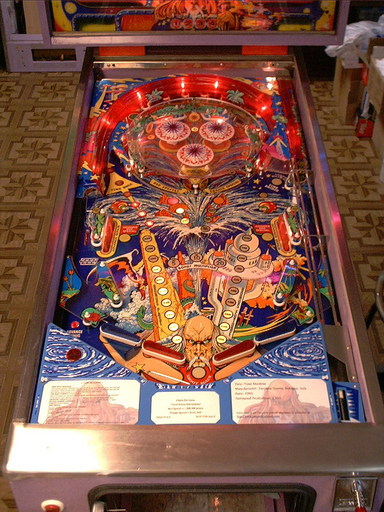
| Flippers and ball trough sheetmetal. | Playfield essentially complete and lit up. |
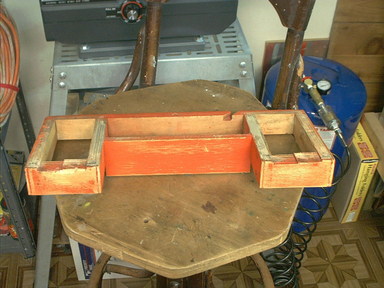
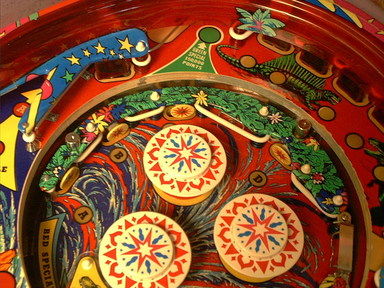
I picked the better of the two playfields, and the better parts from both of them, to build one nice playfield.
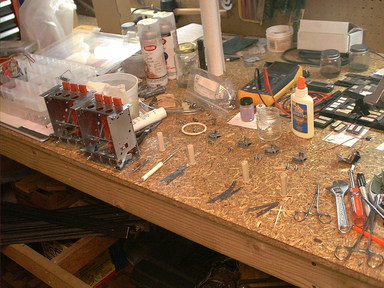
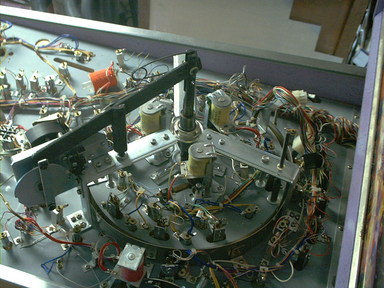
The mini-playfield was redone first. I removed everything that wasn't stapled in place, cleaned, polished, and waxed the playfield surface, then started building it up using the best parts from both. The standup targets were in much better condition on the other one, but the surface and pop bumpers were better on the one I went with. The chrome plated posts were cleaned, then buffed out with jewlers rouge to a high luster. Plastic posts and parts were all cleaned as well. The better of the two plexiglass tops was cleaned and polished with Novus plastic polish. The pop bumpers were rebuilt with new sleeves, and Mylar trim rings were installed to protect the surface.
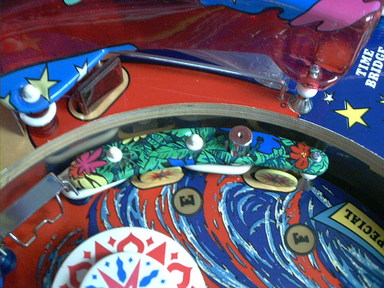
The main playfield was then also stripped of parts top and bottom, except for the wiring harness and lamp sockets. The surface was cleaned, rubbed out, polished, and waxed. I added Mylar patches where the ramp meets the playfield surface, to protect a small touched up (blue) area under the ramp, and to the left lane where the ramp exit dumps the ball. The slingshot and drop target mechanisms were rebuilt, as were the four flipper assemblies, again using the best parts from the two playfields, and new parts for things like coil sleeves and EOS switches. All of the various playfield pieces were cleaned, the chrome plated parts were buffed with rouge, and everything reassembled.
Three of the vacuum formed plastics for the playfield were damaged. This required some creativity, since they were damaged (differently) on both playfields. See the section below on Plastics for details.
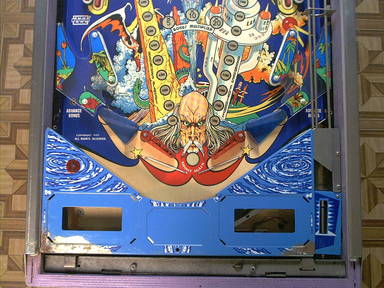
This playfield has one flaw. Somebody, for some reason, drilled holes in it where the eyes of the old man are, between the slingshots. The holes are small, but since they are there, I decided to make use of them. See the Customization section for details.
 |
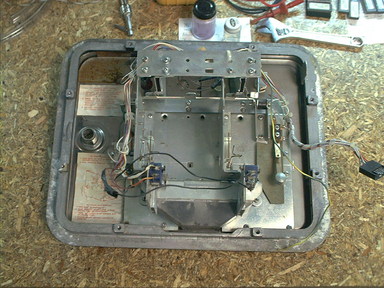 |
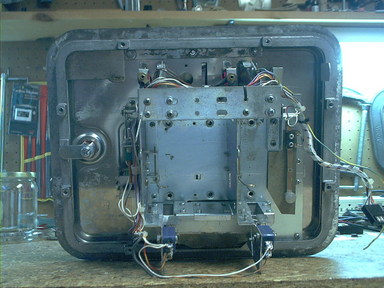
| Coin Door - Front | Coin Door - Back |
 |
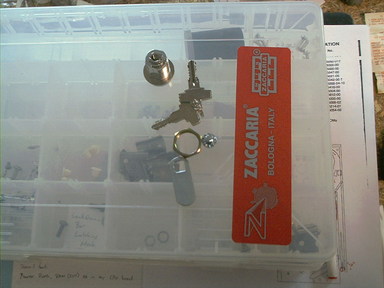 |
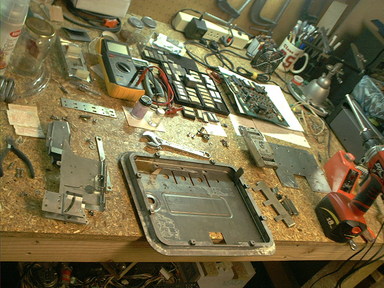
| Coin Door - Pieces | Coin Door - New Parts |
 |
 |
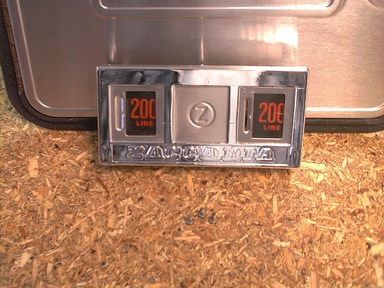
| Rechromed Coin Bezel | Coin Door - Back |
 |
 |
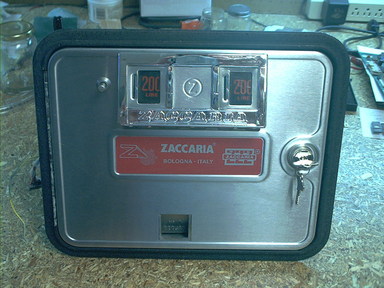
| Coin Door - Reassembled | Coin Door - Reinstalled |
The coin door got a basic rebuild. It was disassembled down to its component parts, everything was cleaned and de-rusted, then reassembled. The lock was replaced with a new one, keyed to match the rest of my games. The sticker on the door was replaced with a reproduction. The bezel was replaced with one that I had previously stripped and had re-chromed (read about that project here). The three stickers on the inside of the door were not in good shape, so I made reproduction stickers to replace them. With some 200 Lire coin inserts, it was reinstalled in the cabinet. The wiring harness connector in the cabinet was badly corroded, so it was replaced with a new housing and pins.
 |
 |
| Cabinet parts | Cabinet parts |
 |
 |
| Cabinet parts | Legs |
 |
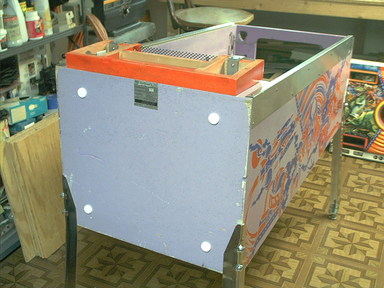 |
| Cabinet with legs installed | Cabinet neck reinstalled |
 |
 |
| Backbox hinge and latch hardware reinstalled | Backbox installed on the cabinet |
 |
 |
| Backbox door and insert reinstalled | |
 |
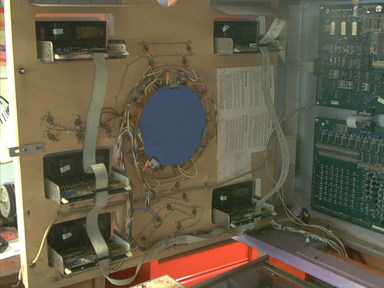 |
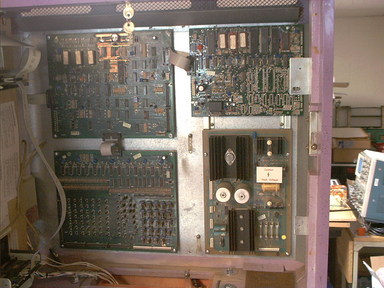
| Boards reinstalled | Diplays and wiring harness |
After 5 or 6 weeks worth of cleaning, polishing, fixing, and replacing parts, usually the assembly phase is pretty straightforward, without much drama. Grab the newly cleaned parts, bolt them together, then move on. Except for this time. This time, there are a couple of snags.
First, the legs (pictured above) that I had for this game cleaned up nice, I put on new levelers and bolts, and they were good. Except that they're only 27" long. Zaccaria games need 28.5" legs. So the game looks good, but is too short. New legs are being acquired.
Second, the ribbon cables and inter-board wiring harness for the backbox were missing. I made new ones to replace them.
Third, right after installing the backbox door, I wired up the neon tube to the backbox transformer and turned it on. I was rewarded with a half second of beautiful three-colour neon light, then the line fuse blew. Somebody had previously replaced the transformer with something that looked like maybe it used to work, but now it blows the line fuse and is no good. I was lucky enough to source a replacement (correct) transformer from a friend. I installed that, replacing the other one, put in a new line fuse, and began to connect the neon tube to the wiring from the transformer when ... ""crack...hiss" ... I broke the nipple off the end of the neon tube.
Several desperate email messages were sent out to local people that I thought might know where I could get a custom three-colour neon tube created, locally, in a hurry. Over lunch the next day, I went through the phone book and called several places advertising neon signs or neon repairs. I found that several local shops that advertise for custom neon all do only the sales and installation, they actually farm out the work of creating the neon tubes to another semi-local guy. I called him, and he said it'd be no problem, he just needed to see the old tube to get the size and shape, and he'd need about a week to make a new one. With two weeks to go before Expo, that sounded good to me. A lunch-time run up to his shop the next day got that underway while I went home to work on the rest of the game.
And true to his estimate, about a week later, he called to let me know that it was done and ready to pick up. I ran up there after work that day, and picked up my new tube. By this time, I was more than a little nervous as I installed it to replace the broken one, wired it up to the transformer (carefully!), and eventually was able to turn it on. With the correct transformer in place, it fired right up.
 |
 |
 |
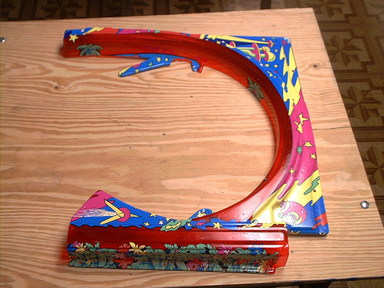
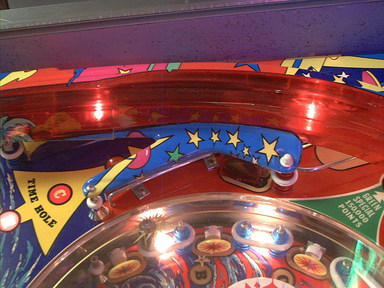
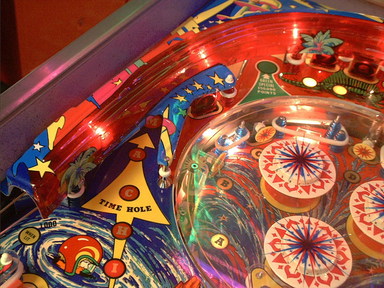
| Ramp cover plastic. | Closeup of damaged area. |
 |
 |
| Removing a section. | Cutting off the damaged area. |
 |
 |
| Glued and clamped. | |
 |
 |
| Repaired ramp cover plastic. | Closeup shot of repaired area. |
 |
 |
| Installed on the game. Repair is nearly invisible. | |
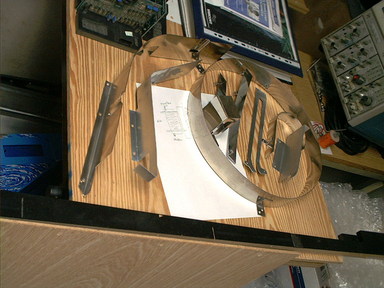
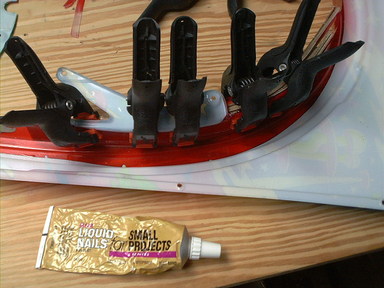
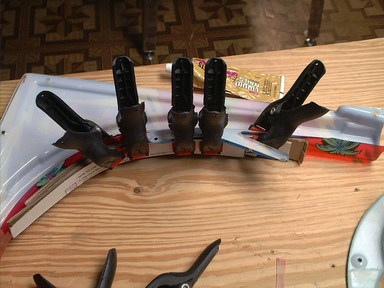
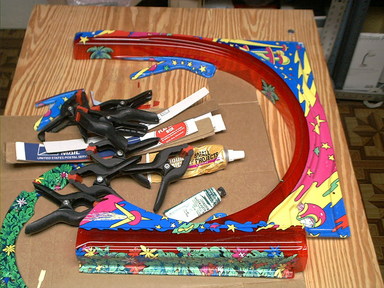
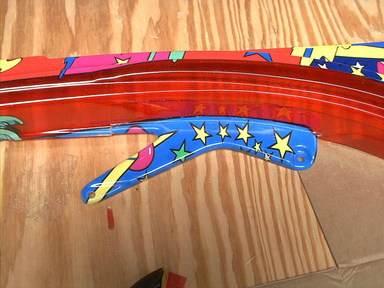
This was the first problem plastic. Being a large, vacuum formed part, there was no way I could easily reproduce it, with artwork, at home. Between the two playfields, I had two of them, both damaged but in different places. After looking over the situation, I decided to try splicing the good part of one on to the other. I picked the better of the two as the one to use, and the other one as the donor. The plastic used is relatively soft, and can be scored with an XActo knife, then broken in a clean line. I chose the section, and carefully removed it from the donor plastic. By taking an inch or so of extra plastic with it, I had something to work with. I then carefully removed just the damaged part of the "good" plastic. Then glue and spring clamps were used to graft the good section from the donor on to the otherwise good plastic. After letting the glue set up overnight, the ramp cover fits perfectly on the game, and the repair is almost invisible.
 |
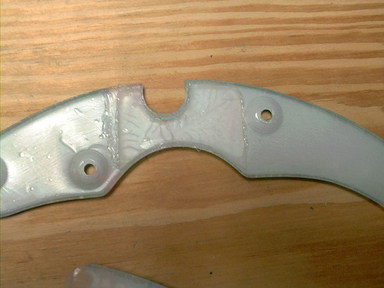 |
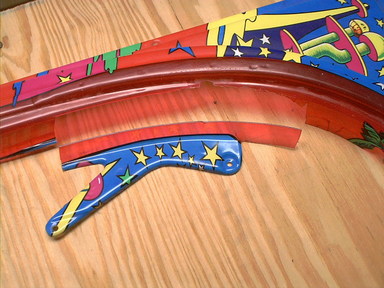
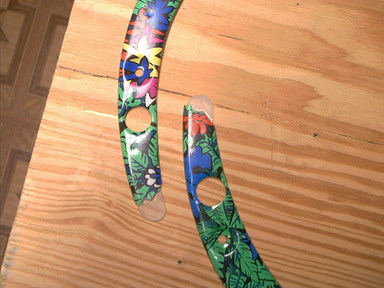
| Chipped and missing ends. | Broken plastic. |
 |
 |
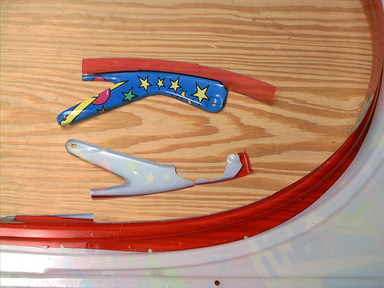
| Built up with putty. | Hand painted artwork. |
 |
 |
| Repaired plastics reinstalled on the mini playfield. | |
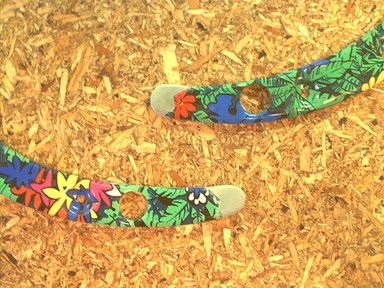
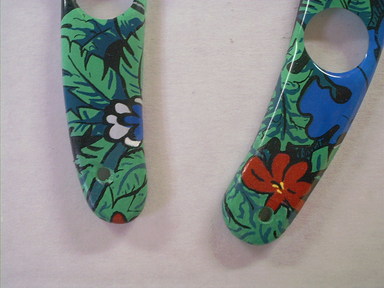
This was the second major plastics problem. These two plastics are mounted on posts on the mini playfield, covering the standup targets. Both have broken off ends (missing), and one is also broken in half.
The first step was to cut some clear Lexan patches, and to glue them in place to repair the broken piece and to extend the ends out to the mounting posts.
The second step was to use some Squadron Green plastic putty to build up the extended ends to match the profile of the vacuum formed plastics. This took several coats of Squadron Green, and some sanding, but eventually the form was matched and they looked to be about the right shape.
I drilled the mounting holes for the screws and test fit the pieces on the playfield before continuing.
Hand painting the artwork on the extentions was both easier and harder than I expected. I coated the putty first with white, to provide a base for the rest. Then a couple of coats of light green, mixed to match the light green of the plastic, were put down. That was relatively easy to do. Then the other colours (red, dark green, blue, white, yellow, black) were used to create some artwork that looks like it belongs there. I do not claim to be an artist, but I think they came out looking really nice. The only question now is will this repair hold up to game play. I will have to update this section after Pinball Expo.
Not completed before Pinball Expo. Will be added later...
The plan here is to build a circuit, triggered by the relay that operates the mini playfield motor, that will pseudo-randomly flicker two 3mm clear green LEDs mounted in the holes that have been drilled in the eyes of the old man in the playfield artwork between the slingshots.
Once this is designed, built, and tested, I will update this section and add the schematic and parts list.
I would not normally want to do something like this that requires drilling holes in a perfectly good playfield. But, on this one, the holes are already there and will need to be filled with something. This custom modification is being done only to make use of the holes I already have.
 |
 |
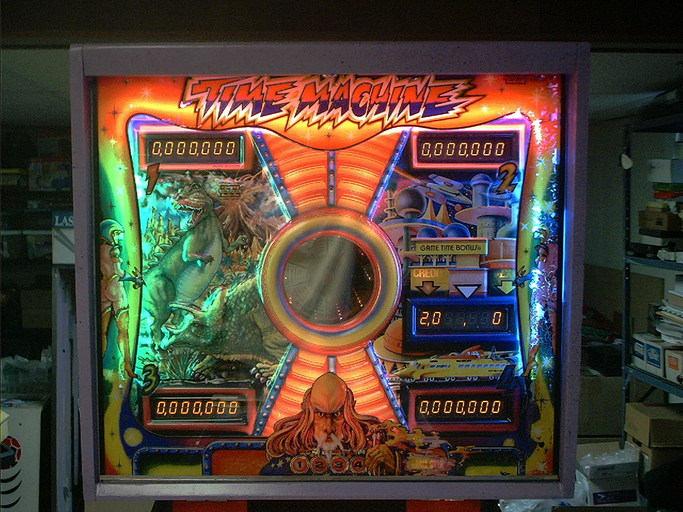 |
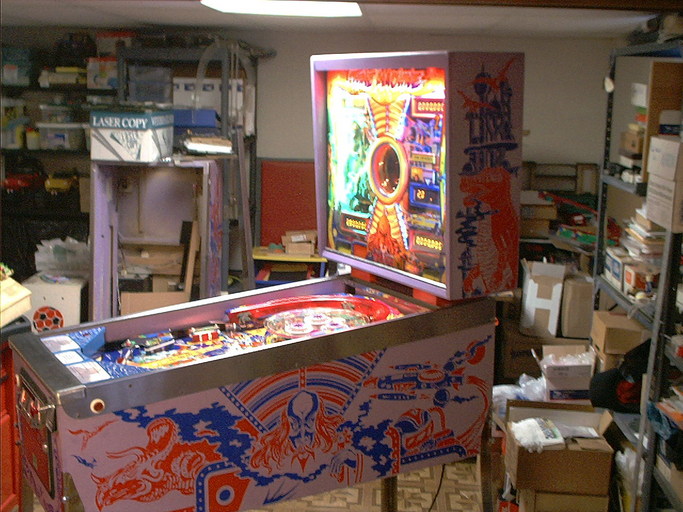
| Game Overall | Playfield | Backglass |
 |
 |
 |
| Playfield: Top | Playfield: Middle | Playfield: Bottom |
 |
 |
| Backbox Left | Cabinet Left |
 |
 |
| Backbox Right | Cabinet Right |
 |
 |
| Cabinet Front and Coin Door | Cabinet 3/4 View |
Restoration complete: 1 November 2006.