

Full game restoration, Fall 2004 through Spring 2006
An extensive restoration of a game, one of the most extensive I've done, and far more in-depth than I had originally planned. I picked this game up from another collector that was considering parting it out. It wasn't in bad shape, and was complete, so I decided to rescue and restore it. A couple of years later, with many things learned along the way, I'm finally playing it.
Pictures before restoration began. Note that there aren't any major problems, just a bunch of minor ones.
|
|
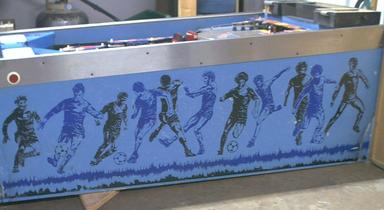
| The backglass | The cabinet | |
|
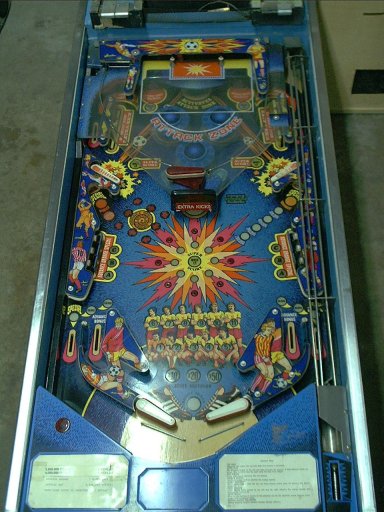
| The backbox | The playfield |
In these shots, notice that the game looks ok, but there are numerous small dings in the cabinet. The backglass isn't perfect, but it's pretty good, and the playfield is dirty, but in decent shape.
 |
 |
| The cabinet front | The cabinet side |  |
 |
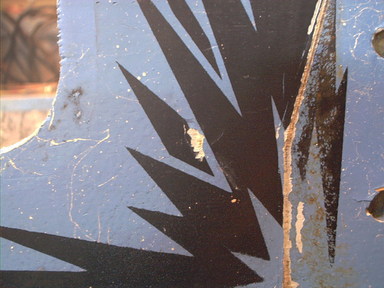
| Cabinet front, top right | Cabinet front, bottom left |  |
 |
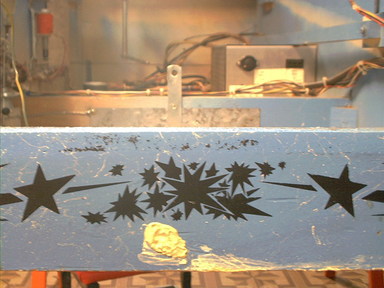
| Cabinet front, bottom edge | Cabinet front, bottom right |
In these pictures of the cabinet front, the most visible part of the cabinet, note the hole somebody drilled, probably for a "credit" button, the dings in the cabinet, the "fading" of the black on the left side, probably from wear, and the lame touchup of the black with what looks like it was probably a marker.
 |
 |
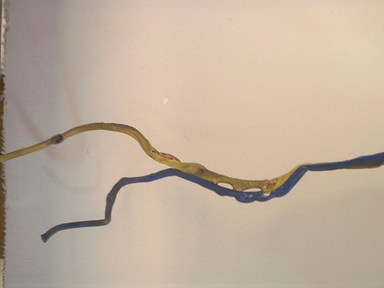
| The cabinet neck | Interesting solenoid coil hackery |
A couple of problem areas to address. The neck is bashed in on the left, and generally in poor condition. The extra screws holding it to the body only helped a little bit. I'll deal with this in the restoration. The insteresting solenoid coil arrangement seems to have worked, but it's not the right way to fix a bad ball ejector coil.
I decided on a full restoration of the game. This will include not only the basic refurbishment of all parts, rebuilding all the mechanicals, but will also include paint touchups, playfield touchups and clearcoating, and more.
 |
 |
 |
 |
 |
 |
| Cabinet restoration - plug the hole, repair the cabinet where it separated by the neck, putty the dings. | ||
I started with the cabinet body. Removing the coin door, plunger, and neck, we start with some a dowel rod cut to size to plug the hole, then some putty to fill in the rest. Same putty used to fill in the minor dings and body dents.
 |
 |
 |
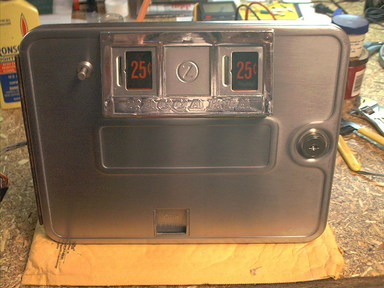
| Rebuilding the coin door: Before. | ||
 |
 |
 |
| Rebuilding the coin door: During | ||
 |
 |
 |
| Rebuilding the coin door: After | ||
While the body was being worked on, the coin door is stripped down to parts, all the parts cleaned and de-gunked, and reassembled. There were a few wiring hacks in the harness for the door, which were corrected.
 |
 |
| Cabinet front after masking and spraying the black. | Cabinet front, with the coin door reinstalled. |
 |
 |
| Cabinet neck. | Cabinet back side with new feet installed. |
 |
 |
| Cabinet sides - after touchups. | |
I replaced the neck with one from a parts game. It came off a Time Machine cabinet, which uses an orange neck, so I painted it black and speckled it using a toothbrush and some white paint. Looks much nicer than the old one. And doesn't the cabinet front look nice with that fresh coin door in it? The blue areas were touched up by hand (light blue and dark blue, whole cabinet). The black pattern on the front was masked with Frisket film and sprayed black. The black areas on the sides of the cabinet were touched up by hand. The entire cabinet was then sprayed with Krylon Crystal Clear to protect the touchups.
 |
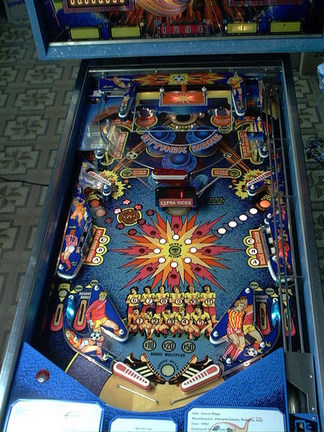
 |
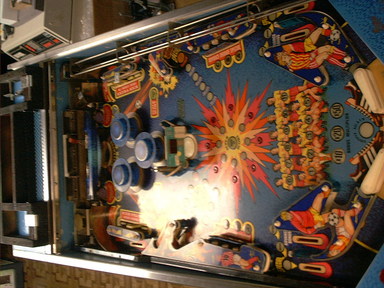
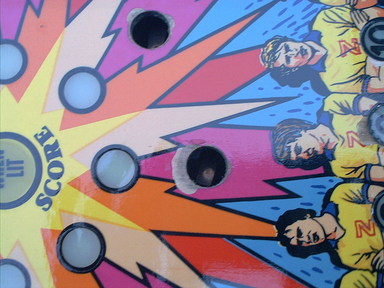
| The playfield | Playfield: Top Centre |
Tearing down the playfield begins.
 |
 |
 |
| Playfield: Top right | Playfield: Mid right | Playfield: Bottom right |
 |
 |
 |
| Playfield: Bottom left | Playfield: Mid left | Playfield: Top left |
 |
 |
 |
| Playfield: Top | Playfield: Mid | Playfield: Bottom |
With the top-side parts removed, here's the surface of the playfield, ready for cleaning and polishing.
 |
 |
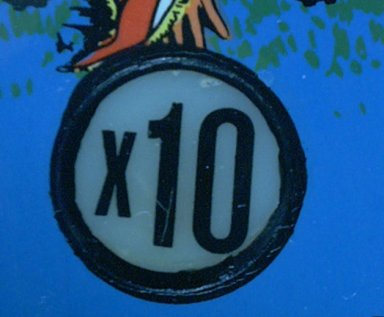 |
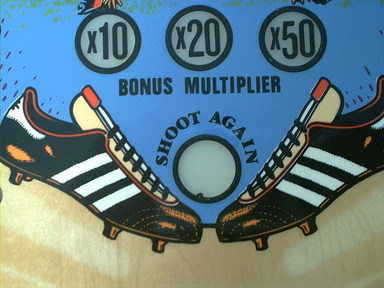
| Before | ...During... | After |
The 10X bonus insert had gotten loose at some point, and was damaged, then glued in wrong. It was sitting too high, plus it was rotated in the hole. Here's the result of sanding it down, cutting a stencil from Frisket film, and spraying the 10X text back on it. The black circle outline was retouched by hand.
After some further work, the 10X insert looks pretty good now.
 |
 |
| Drop Target Bank Parts | Drop Target Bank |
 |
 |
| Drop Targets: Before | Drop Targets: After |
Rebuilding the two banks of drop targets. Disassemble, clean everything, and put them back together. The targets themselves, in addition to being dirty, have some ball marks on them and the original stamping ink has worn away. As an experiment, I hand retouched them with Krylon Fusion paint meant for painting those outside plastic toys that kids have. We'll see how they hold up in practice, but they look really nice now.
 |
 |
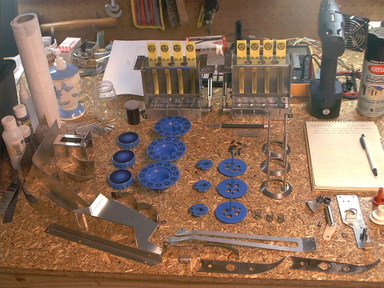
| Pop bumpers and various playfield sheetmetal parts, ready to go. | |
 |
 |
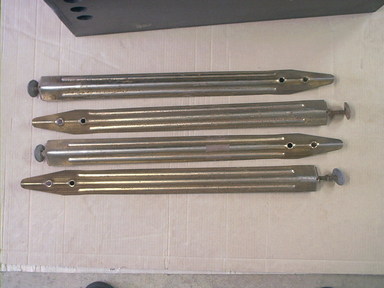
 |
| Ball ejectors | Ball ejector pieces | One rebuilt ball ejector |
The two playfield ball ejectors were rebuilt, along with all of the other playfield parts. The odd Bally and Stern coils were sent off to somebody who may be able to put them to good use some day, and in a bit of karmic trading, another collector was parting out a Soccer Kings and sent me one of the ball ejectors for parts. That provided a spare coil, and other bits and pieces. These mechanisms take a beating, and between the three, I was able to build two good ejectors. Some of the remaining pieces have gone to help other collectors.
 |
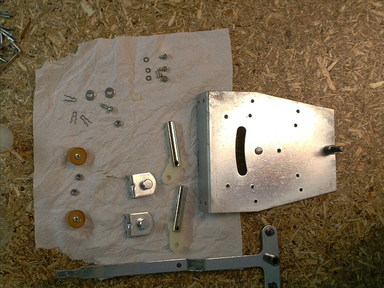 |
| Goalie assembly | Goalie assembly pieces |
 |
 |
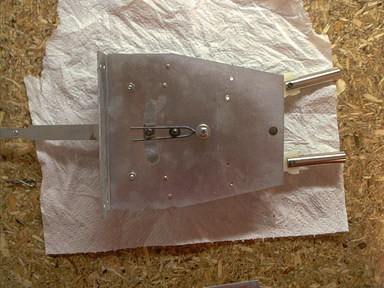
| Goalie assembly back | Goalie centering spring |
The upper playfield goalie assembly being rebuilt. The original centering spring had broken, allowing the goalie to flop to one side instead of returning to the centre. I made a new centering spring, but it didn't last. So, I modified the assembly to use a different type of spring.
 |
 |
| Goalie assembly - modified with springs. | Goalie assembly - closeup of the modification. |
The modification is simple, just adding two bolts with some fabricated spacers to allow two coil return springs to be used instead of the original setup that required an unobtanium replacement spring. In the game, it works perfectly.

Here's the playfield, touchups complete and about to be prepped for home clearcoating with Varathane...
...and this is where the first tradgedy of the restoration struck.
 |
 |
 |
| Playfield fisheye | Playfield crazing | Playfield crazing |
I had a couple of good coats of Varathane on, following the manufacturer's recommendations and some other good advice. It was looking pretty good. I was allowing time to cure between coats, lightly sanding, and spraying another coat. I believe what happened first is that the tack rag I was using to wipe the playfield between coats got contaminated. The left picture is the fisheye that resulted from this.
At this point, I had to sand down the surface to get it flat again, which meant waiting for the Varathane to cure enough to be able to sand it. It was at this point that I made a bad situation worse by changing plans. I had started with Varathane's Semi-Gloss as I did not want the playfield to be too glossy when I was done. Since I was sanding it out again anyway, I decided to switch to Varathane Gloss for the remaining coats.
It appears that the Gloss reacted badly with the freshly sanded Semi-Gloss that was already on the playfield. The centre and right pictures tell the story. The Gloss seems to have attacked and crazed the underlying Semi-Gloss coats. The entire surface is now pockmarked with little holes and imperfections. Attempting to sand this out and re-spray it was not successful, and in fact it seemed to make the problem worse.
I still have the playfield, and may attempt to salvage it by sanding it down and having an automotive clear applied to it. Maybe someday. For this project, though, this playfield is now ruined.
I purchased another playfield from a game being parted out. It's not in quite as nice shape as the one that I just ruined with Varathane, but it'll have to do.
 |
 |
| Replacement playfield before... | ...and after a good cleaning. |
The replacement playfield has some problem areas that will need to be fixed, which means it is going to have to be clearcoated. After the last one, I am more than a little nervous, but with all of the work invested so far, I can't put a playfield with problems in to a really nice cabinet. So, on with the work.
 |
 |
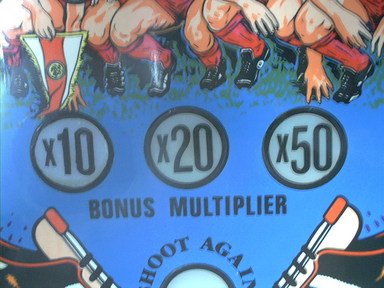
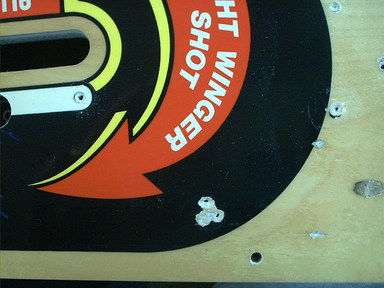
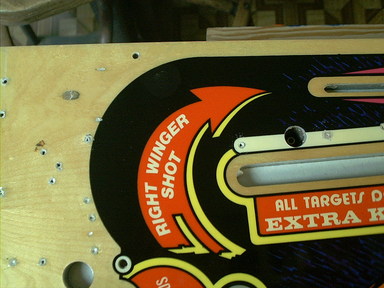
| Somebody added a post here, for unknown reason. | Damage to the area around the Bonus inserts. |
 |
 |
| Damage to the playfield around the rollover buttons. | And more damage around the Extra Ball insert. |
 |
|
| The lower half of the playfield has a Mylar overlay stuck to it. |
It took a while to repair and touch up the paint in these areas, but the results are well worth it. Check out the before (above) and after (below) pictures for details. The Mylar was a very thin film, with really sticky adhesive. It took four cans of freeze spray to get it off, then quite a lot of Naphtha to disolve the glue and lots of scraping to remove it.
 |
 |
| The post, and its holes, are all gone. | The Bonus inserts after touchups. |
 |
 |
| The playfield around the rollover buttons. | And the Extra Ball insert. |
Much nicer looking now. The touchups were done with acryllic paints and a selection of small brushes. All of the colours were custom mixed on the spot to match the area being touched up. Once the paint dried, the touchup was sealed in place with cyanocrylate ("Super Glue") and the area was sanded flat. I was successful in my second Varathane clearcoating attempt, using only the Gloss product this time. Several coats were sprayed, with light sanding between coats. The final coat was wet sanded, then polished out by hand with rubbing compound, Novus #2, and then finally Johnson's paste wax.
While the Varathane on the playfield was hardening, I left the playfield alone for a couple of months and worked on the backbox.
 |
 |
 |
| Backbox: Putty repairs to the gouges and dings. | Sanded out, using white acryllic paint as a primer. | The first layer, light blue, touched up with white spiderwebbing over it. |
 |
 |
 |
| Spraying the dark blue. | Spraying the black. | Backbox: Finished. |
The backbox had many scrapes and gouges and minor dings, significantly more than the body. Plus the front of the backbox had been bashed on the cabinet side rails too many times and was dented in. I repaired and patched the damaged areas using JB Weld epoxy for its strength and ability to be sanded smooth. Once smooth, I primered the repaired areas with slightly diluted white acryllic paint. I then touched up the light blue base coat areas, not being especially careful to "stay between the lines", knowing that the other colours would also need to be touched up. Instead, I used an airbrush to feather in the light blue basecoat.
After much experimentation, I decided that I could not reproduce the fine white spiderwebbing effect that I needed next. I can get speckles, but not webbing. I had a local airbrush artist spiderweb the backbox for me. This turned out to be not such a great idea, as he laid on the webbing much too thick in some areas. I had to scrape off the thickest and heaviest areas with a credit card before I could continue.
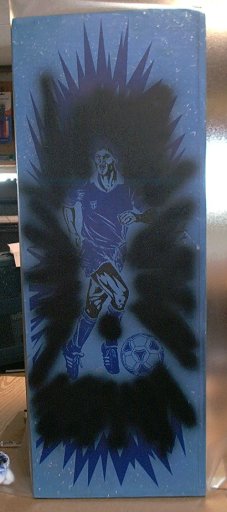
I hand cut stencils for the sides from Frisket film, following the original pattern and using a ruler and an Exacto knife to cut the Frisket. The dark blue goes down first, which was colour matched and applied with an airbrush. After the paint has a minute or so to start to set up, I peeled off the Frisket and then allowed the paint to dry before continuing. Repeating the process for the black, then again on the other side, the results are well worth the time.
With the cabinet and backbox essentially complete, it was time to start reassembling the playfield. By now, the Varathane has had plenty of time to cure.
 |
 |
 |
 |
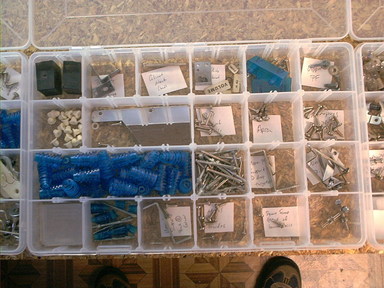
| Playfield Parts - Cleaned and ready to go. | |
Lots of parts, all cleaned up and ready to be installed on the freshly clearcoated playfield. Reassembly starts from the bottom, with assemblies that stick up through the playfield. Pop bumpers get new Mylar trim rings, and new lamp sockets.
 |
 |
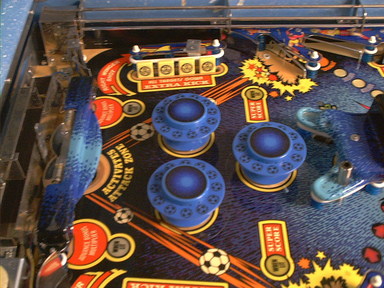
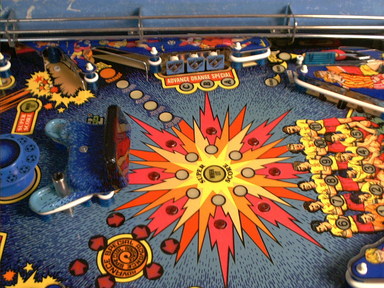
| Top of the playfield being reassembled. | Middle section. |
 |
 |
| The upper playfield ball trough... | ...reinstalled with the rebuilt Goalie mech and ball ejector. |
With most of the playfield reassembled, it's starting to look like a game again. Here is the playfield, with everything by the upper playfield back in place.

 |
 |
 |
| Playfield: Top right | Playfield: Mid right | Playfield: Bottom right |
 |
 |
 |
| Playfield: Bottom left | Playfield: Mid left | Playfield: Top left |
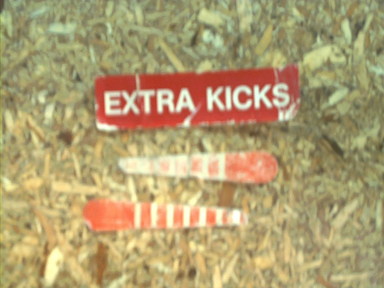
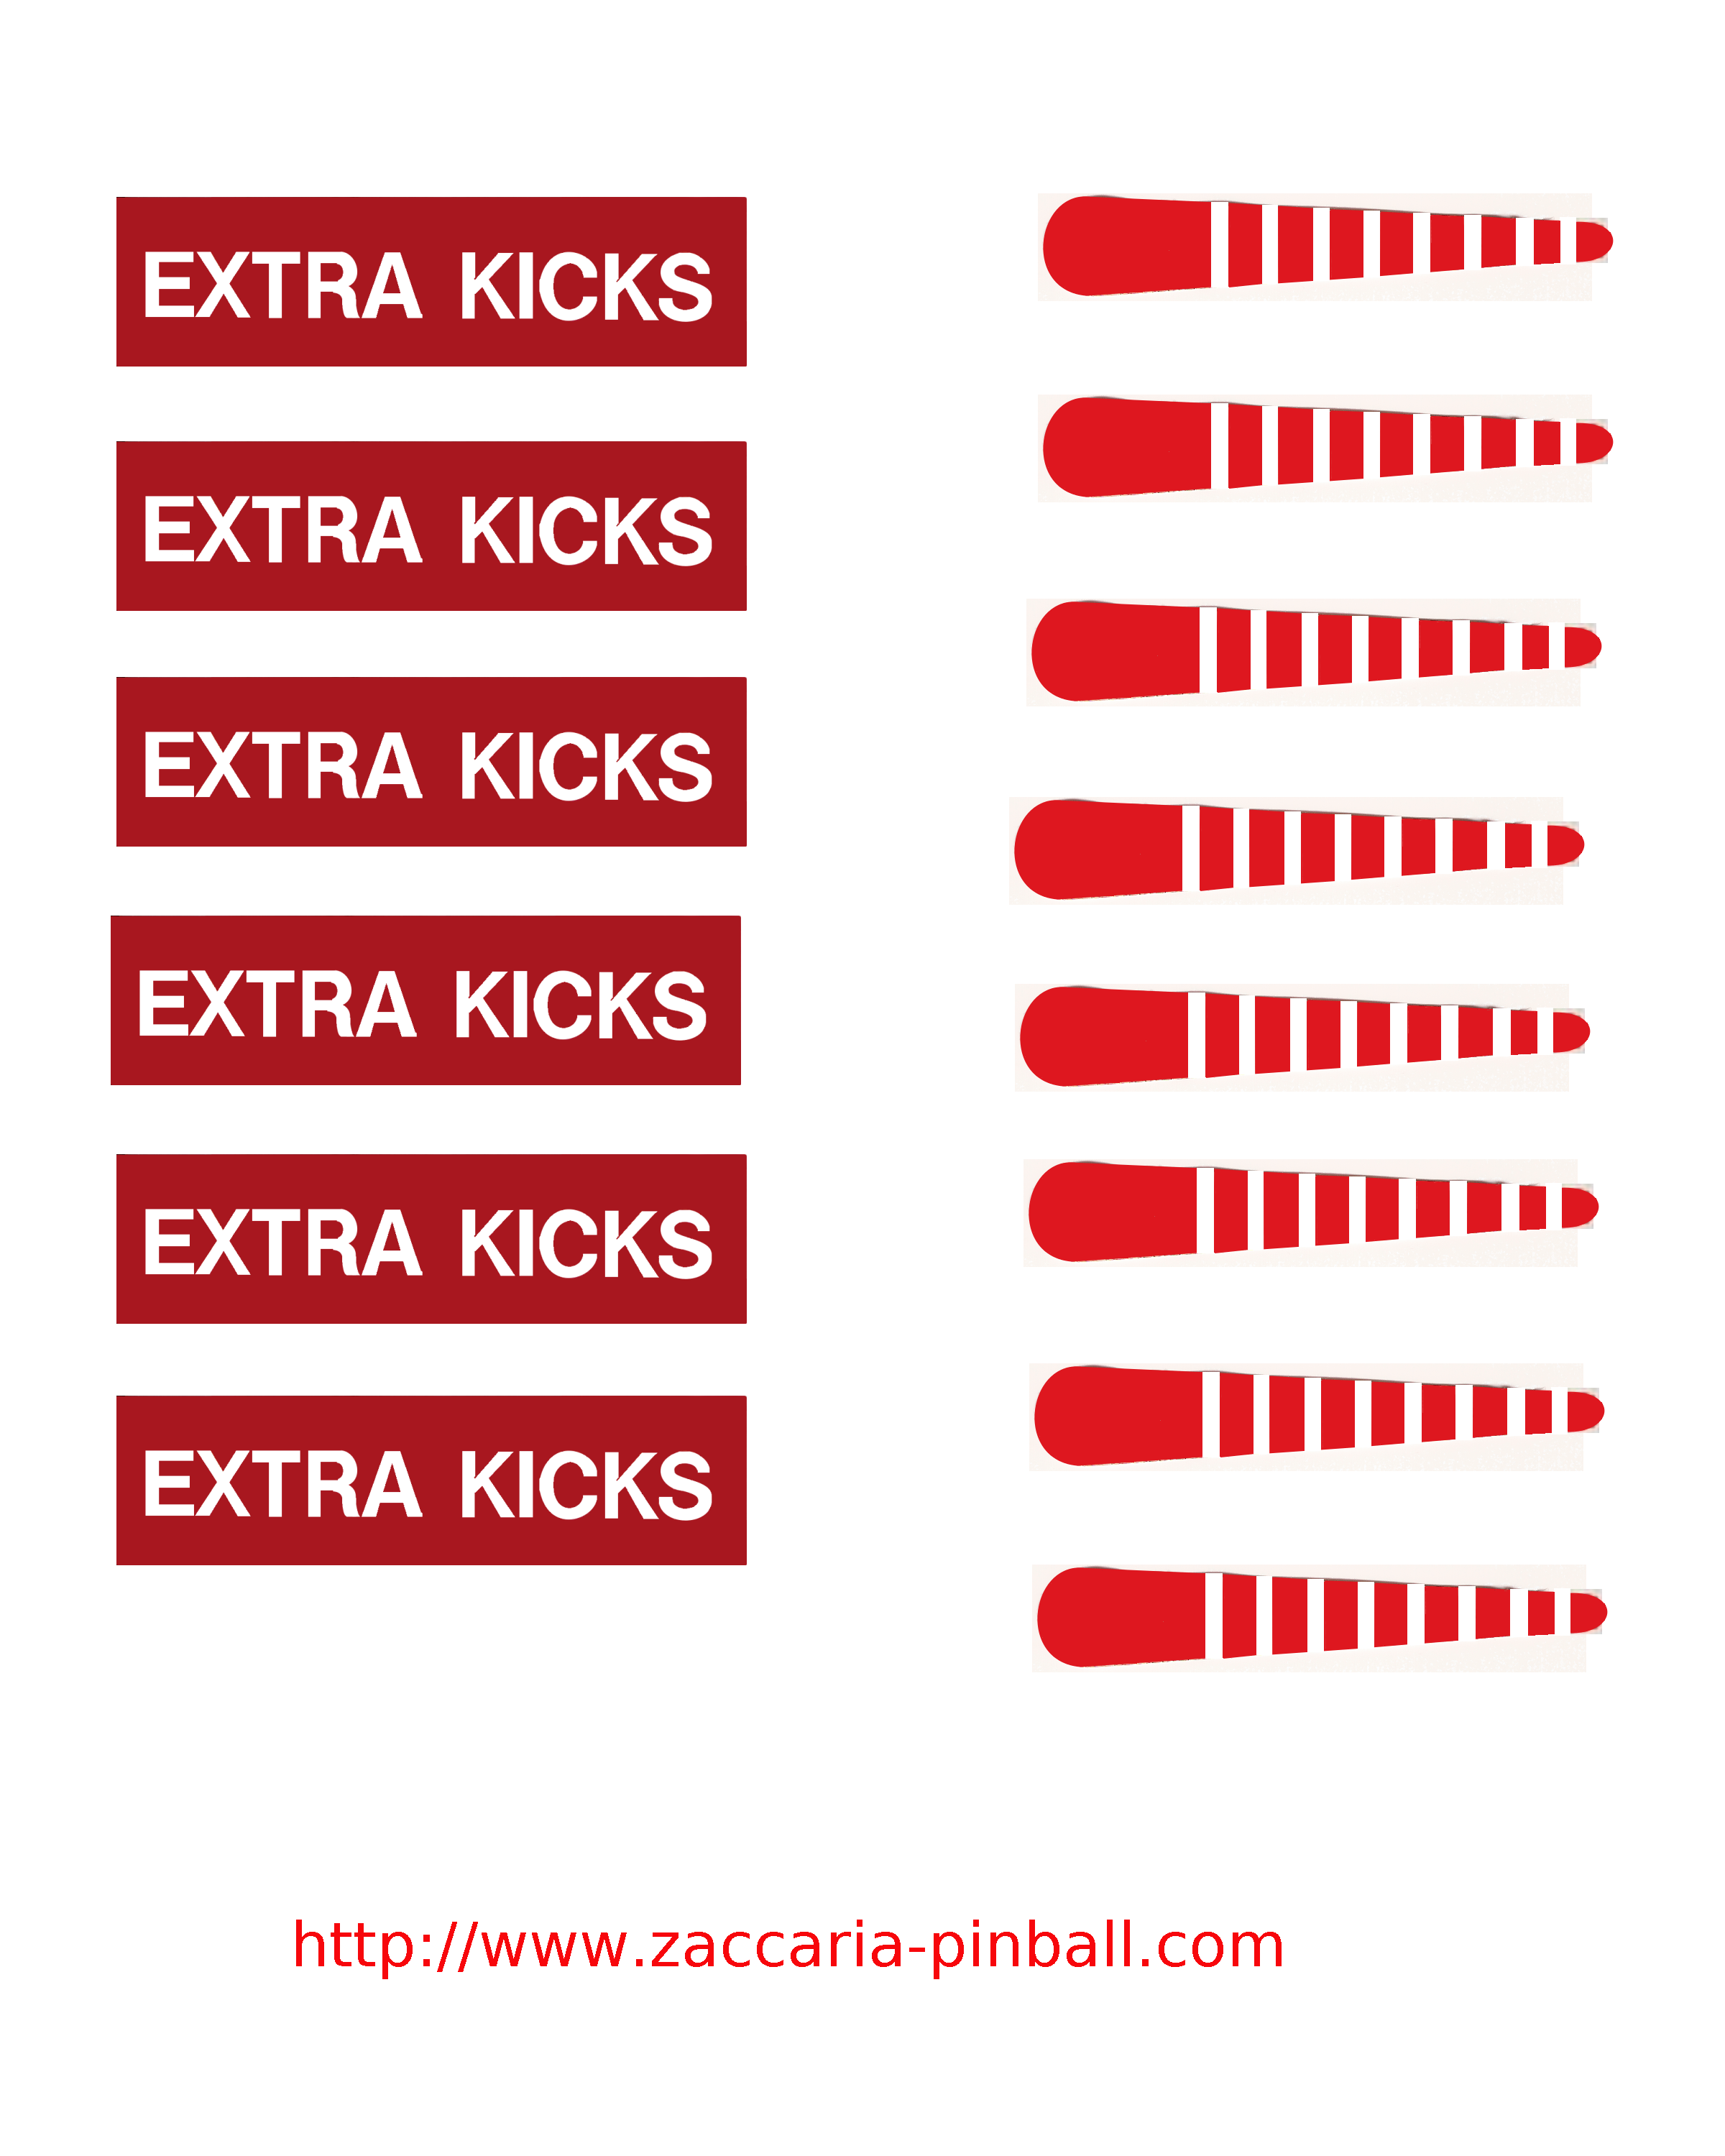
With all of the other work already done, I decided to also reproduce the artwork for the sticker that goes on the front of the Extra Kicks display, and the stickers that go on the tops of the flipper bats. This turned out not to be too difficult, with The Gimp used to scan, touch up, and print the artwork on an inexpensive HP inkjet printer. I laminated the artwork front side with 3M clear packing tape, then used a Xuron machine to put a permanent adhesive on the back side. Sticking the results in place really helps dress up the game the way it was supposed to look. The images for the reproduction artwork are available here.
 |
 |
| Original artwork. | Reproduction artwork. |
 |
 |
| Reproduction artwork installed. | |
With the playfield back together, I turned the game on for the first time to see what might need to be worked on still. After a few seconds, I was greeted with the faint smell of burning insulation...
 |
 |
| Fuse - Bypassed with bits of wire and solder. | Melted wiring harness that results from the fuse being bypassed. |
Elsewhere on the site, I note that you should always check the fuses before turning on a game for the first time. This is why. I had replaced the fuses on the power supply, and the ones under the playfield with new ones as part of the restoration so far, so I neglected this step. The smell of burning insulation greeting me reminded me why this is so important. It turned out to be a combination of things going wrong which starts with the fuse pictured above having been bypassed by somebody. This is the fuse from the fuse holder that is in the rear of the transformer cage in the cabinet, and it is for the General Illumination (GI) lighting used in the game. Somebody must have run out of fuses and "fixed" this one with some strands of wire by soldering them to the end caps of a blown fuse, then shoved it back in the holder. It probably worked, at least for a while. I found the problem on the playfield, a lamp socket next to the upper playfield ball ejector had twisted in place and the tab was now touching the base, creating a short circuit. Normally, this should have blown the GI fuse, but that was no longer possible, so instead the wiring harness itself acted as a fuse by melting. The picture on the right shows the results, once I cut the zip ties and pried the melted remains out of the harness. I had to repair a couple of other wires in the harness that were damaged as well. Fortunately, I was able to remove the melted part of the GI wiring from the harness, and remove the same section from that other playfield to transplant in its place. I also added some heat-shrink tubing to the lamp socket that caused the problem, so that it should not be able to short out again. Then I replaced the fuse with one of the correct rating. The moral is, of course, always check the fuses.
 |
 |
 |
| Upper playfield being reassembled. | Upper playfield, with plastics and fresh rubber. | Upper playfield, misaligned. |
Reassembling the upper playfield itself is easy enough. But it did not fit. Sometimes, interchangeable parts, aren't. I had to bend the mounting brackets for the upper playfield to get it to correctly align with the ball ejector.
 |
 |
| Upper playfield plastics protectors. | |
The first time the upper playfield ball ejector kicked a ball out, I knew I would have to do something about it. Even perfectly adjusted, it whacks the bottom of the plastic that covers it hard. Very hard. I fabricated some Lexan protectors to space the playfield plastic up away from the ejector, and to provide a sacreficial something for the ejector to bang against. If the Lexan breaks, I can always make another one. Replacing playfield plastics is much more difficult, and expensive.
I ended up removing and reinstalling the upper playfield many times while trying to figure out why the game was launching multiple balls on to the upper playfield. There should only ever be one ball in play up there, but on my game if Extra Kicks was greater than 1, then the game would release more than one ball at a time. I did everything I could think of, including adjusting the microswitch for the ball trough, replacing the microswitch (Cherry p/n E51-60B, available from Mouser as p/n 540-E51-60B), adjusting the three leaf switches used for the miss/goal/miss, and verifying the ROMs in my game against the "known good" images that were widely available, all to no avail. I even checked with other owners of the game, and found that others had had this problem too. It turns out to have been a bug in the ROMs. It seems that at least two versions exist, and only one of them works correctly. The other version, which releases multiple balls when it should not, is the one that was in my game. It's also the one that the archives are widely distributed. Oops. So, I now have a good set of ROMs that works correctly (THANKS Frank!), and the images provided here on my site, and on www.ipdb.org are the correct ones.
 |
 |
| Legs! | |
The game probably came with chrome legs originally, but I think black will look better with all of the black on the cabinet artwork. I took a used set of brass plated legs from a project Indiana Jones that I put new ones on, and stripped them using Easy Off oven cleaner, then primered and painted them gloss black. With new leg levelers installed, they're ready to go.
 |
 |
 |
| Playfield scorecard apron... | ...touched up by hand and clearcoated to protect it. | Playfield scorecard apron reinstalled in the game, with custom rule and pricing cards. |
Winding down the restoration, here is the playfield score apron, which had some minor damage and scrapes from the playfield glass sliding over it. I touched up the damaged areas and put a coat of Krylon Crystal Clear on it to protect it in the future. The custom artwork pricing and rules cards are available here.
Finally, after many months, the final results:
 |
 |
| Game 3/4 View | Game Front View |
 |
 |
| Backglass | Playfield |
 |
 |
 |
| Playfield | ||
 |
 |
 |
| Cabinet Front | Backbox Left Side | Backbox Right Side |
 |
 |
| Cabinet Left | Cabinet Right |