I had decided that this would not be an all holds barred restoration project early on, but one thing leads to another some times and I ended up doing more than I had originally planned. When I first bought it, I noticed a bit of playfield wear, and a broken plastic, and that it had the usual scrapes and scuffs from transport and being on location, but it looked reasonably complete and in decent condition overall.
|
|
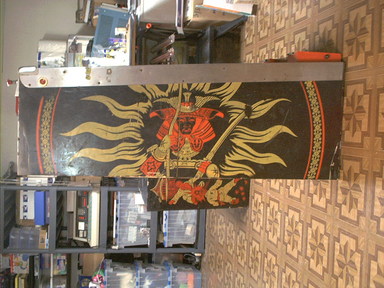
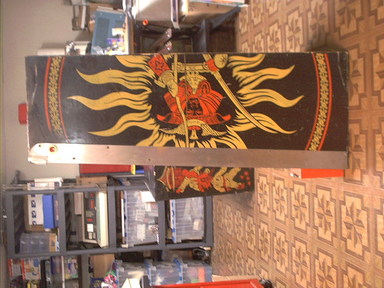
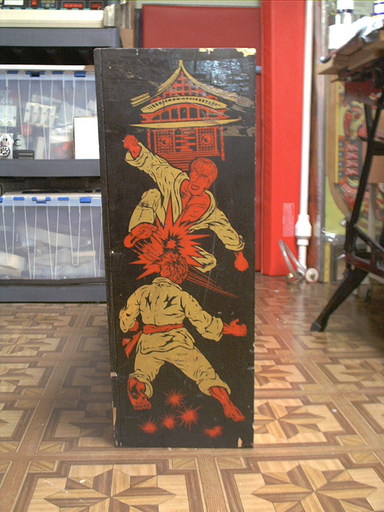
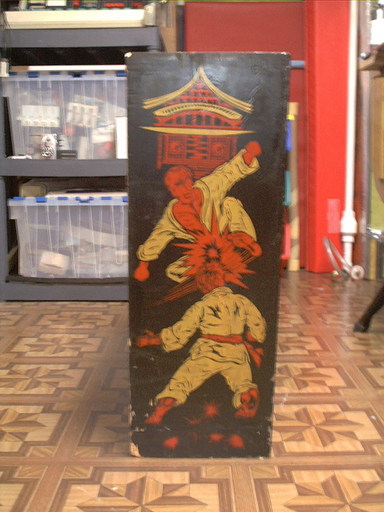
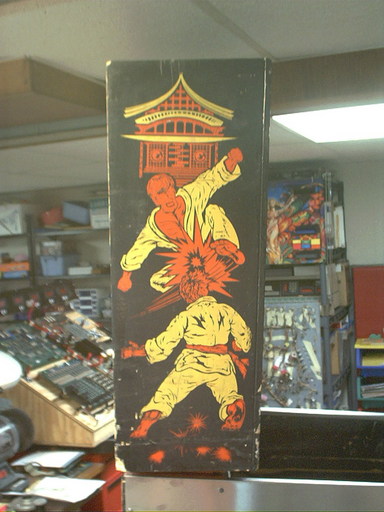
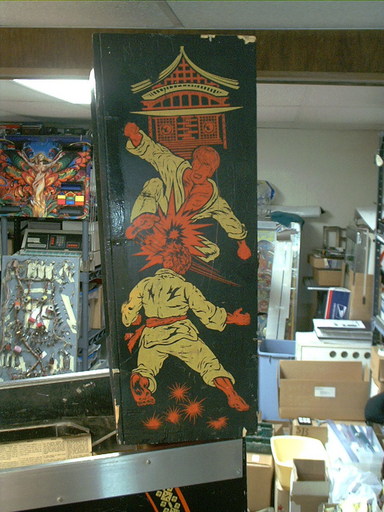
| Cabinet Right Side | Cabinet Left Side |
|
|
| Backbox Right Side | Backbox Left Side |
|
|
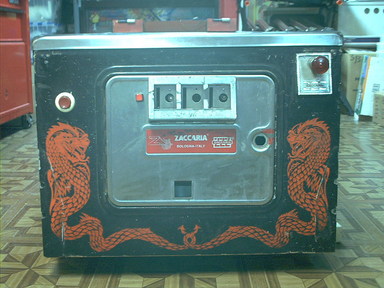
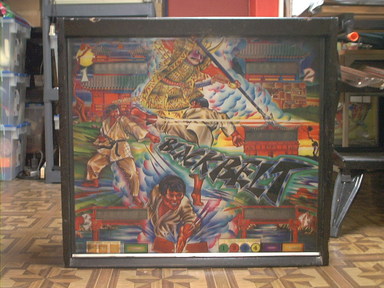
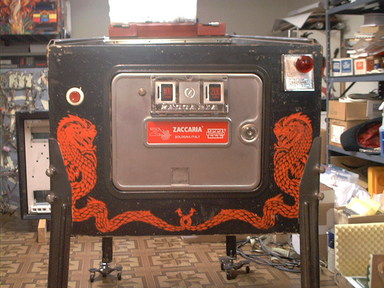
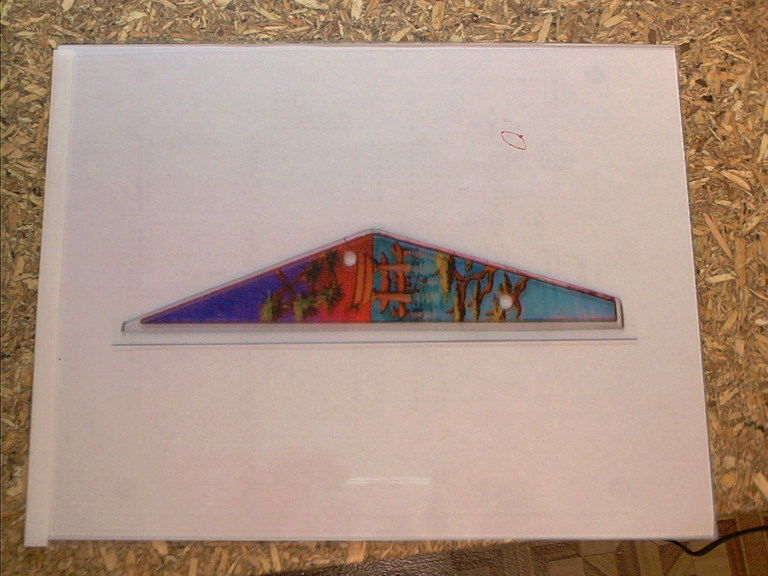
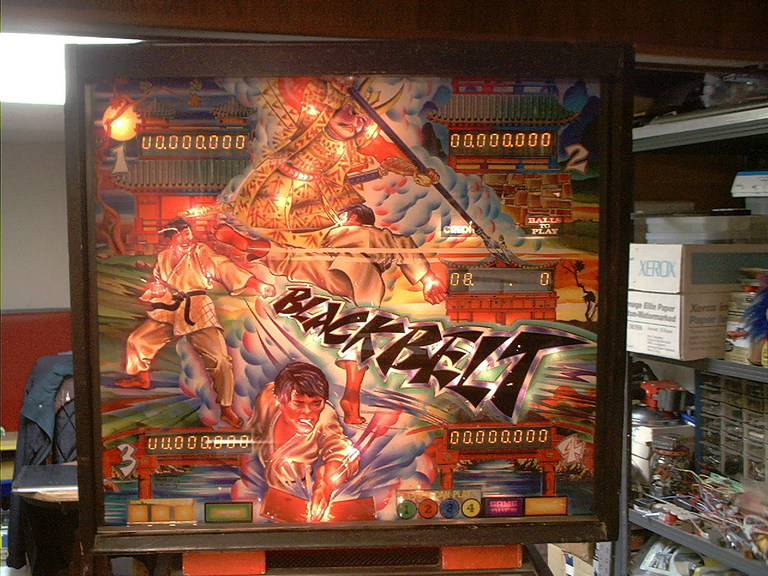
| Cabinet Front / Coin Door | Backglass |
|
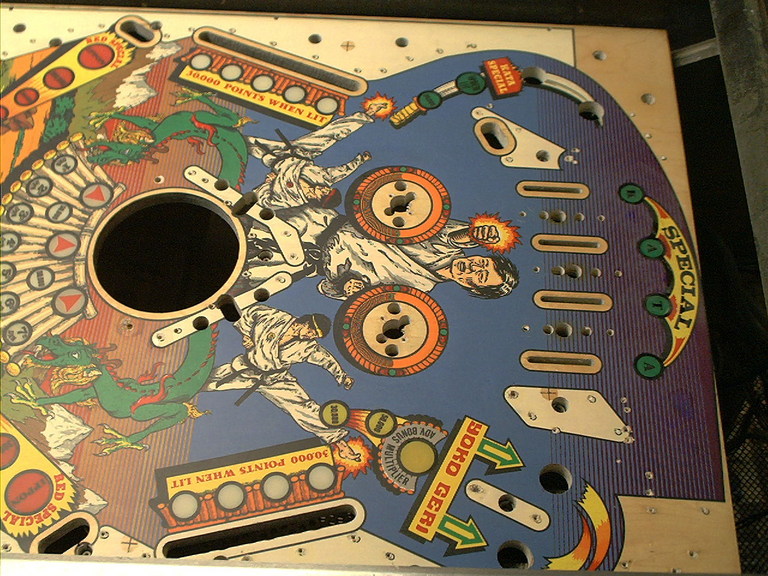
|
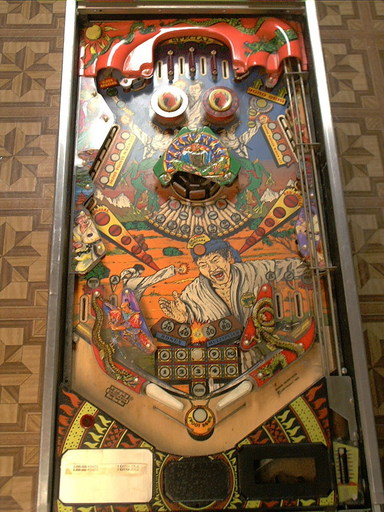
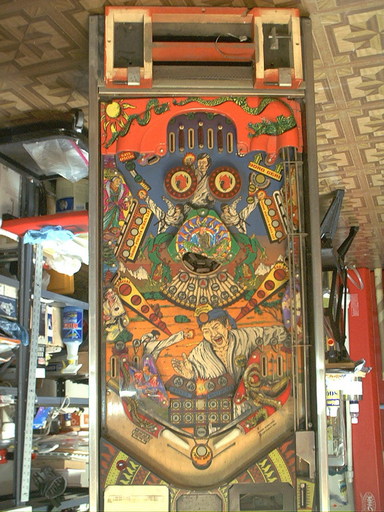
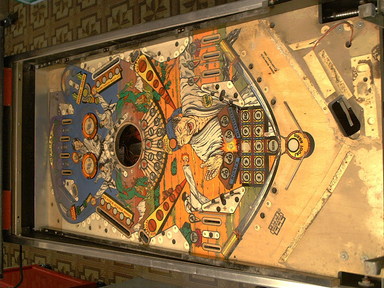
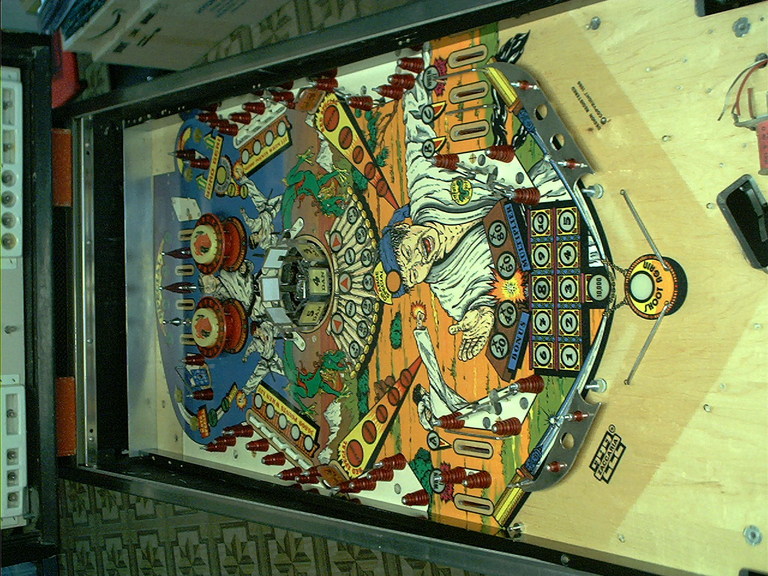
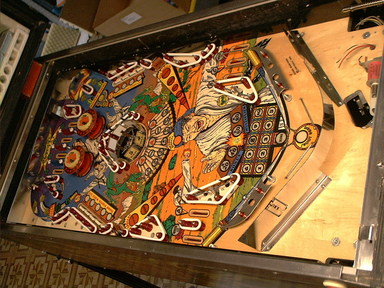
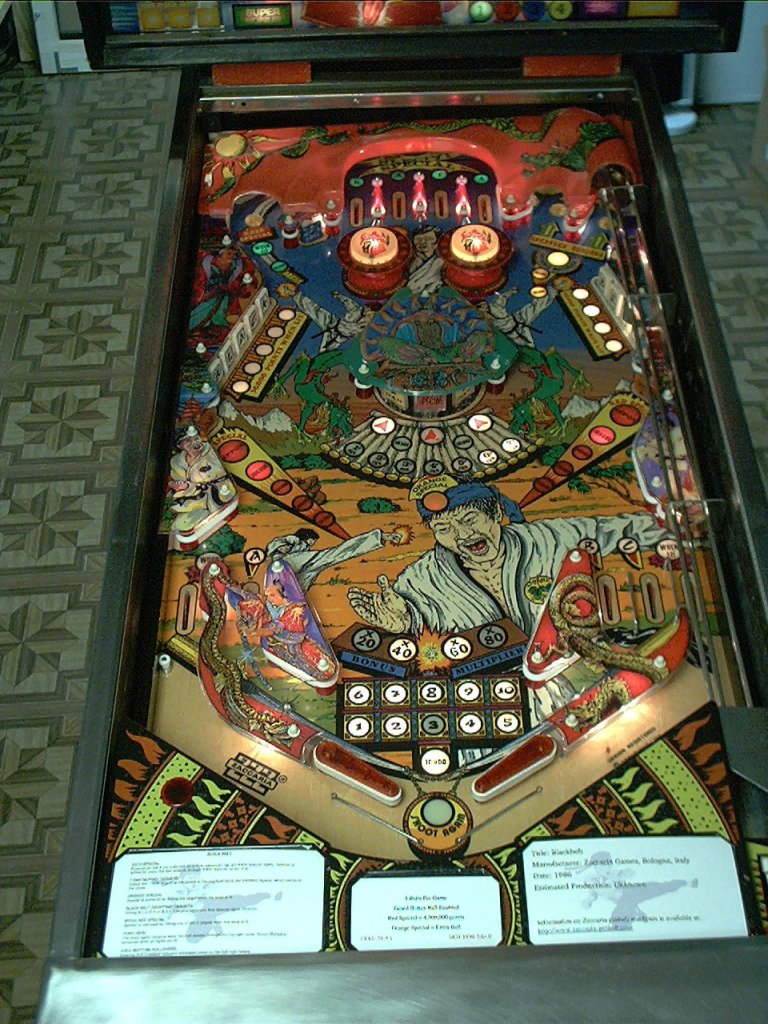
| Playfield Overall | |
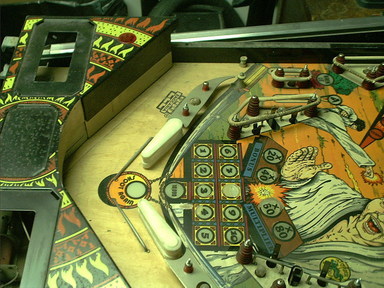
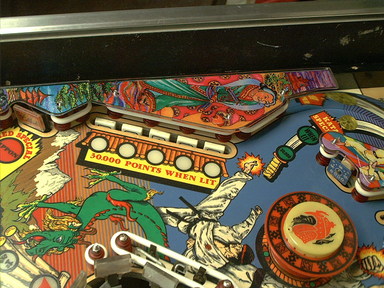
So here is the starting point. My initial quick look was basically right, the cabinet does indeed have some route rash, the coin entry bezel is destroyed, there is a "credit button" where the coin eject button should be, and there is some playfield wear. Oh, and there is that broken plastic over the rototarget. Something will have to be done about that. No legs included, either.
 |
 |
 |
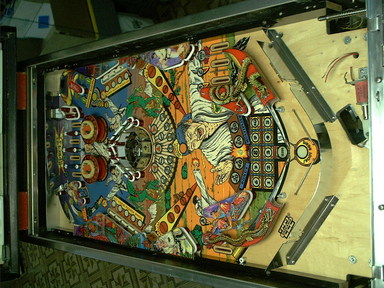
| Playfield sans plastics | ||
Starting with stripping down the playfield, I got the plastics off, tossed the desiccated rubbers in the trash, and started getting a closer look to see what was going to be needed here.
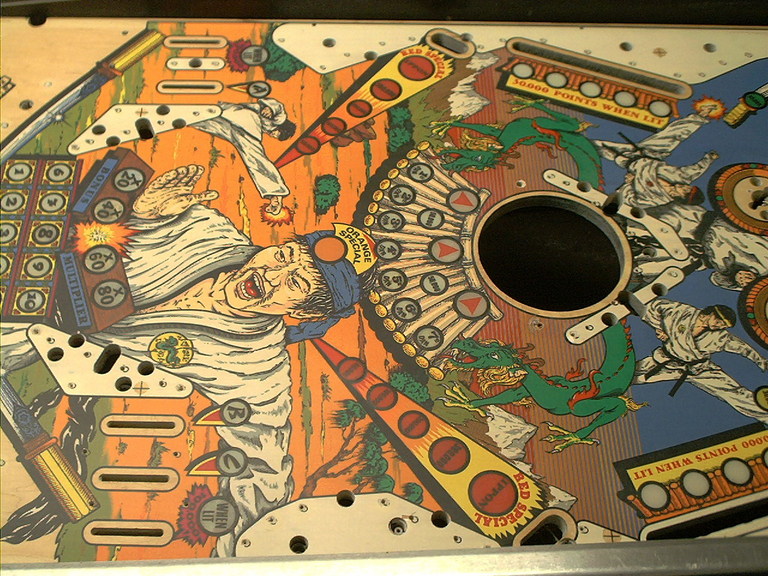
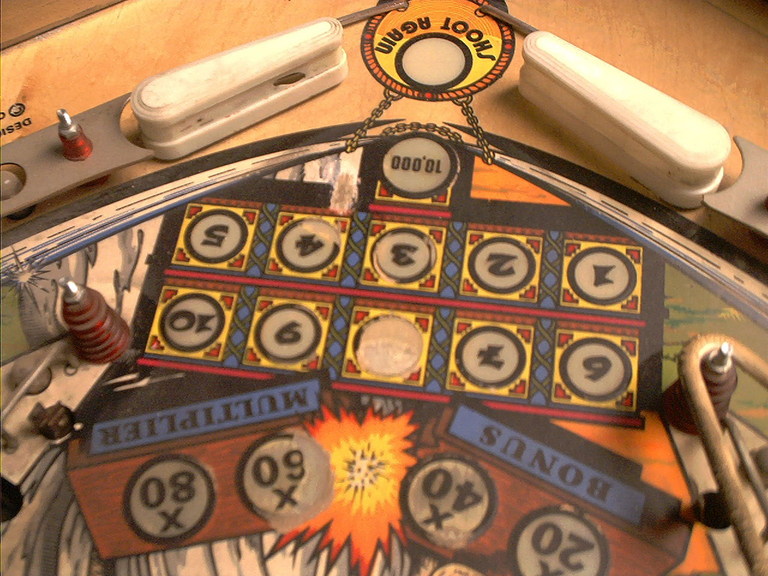 |
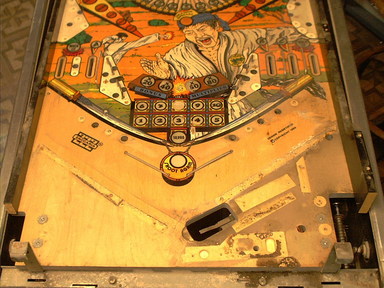
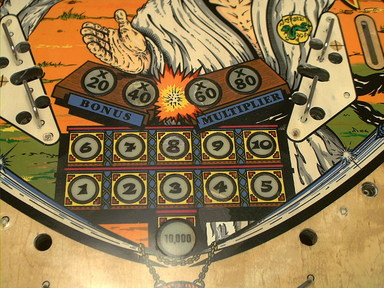
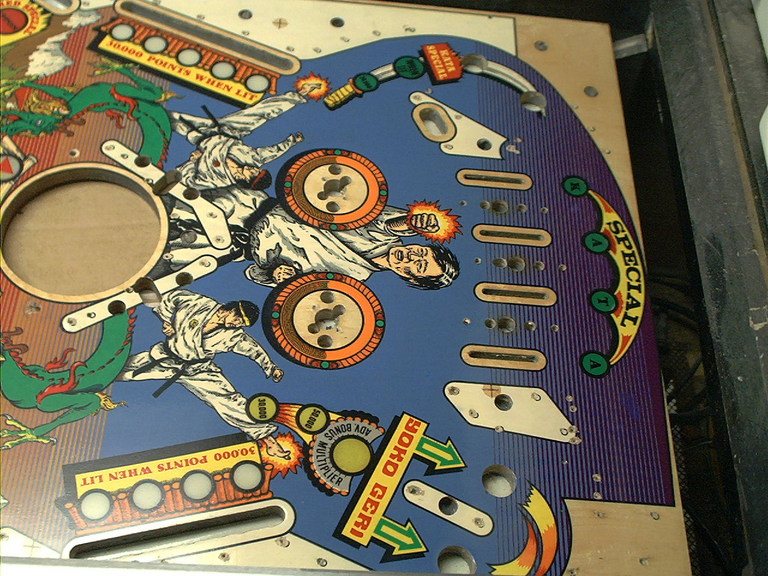
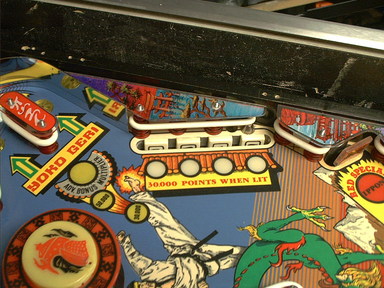
Here is the major trouble spot. Problems, starting from the top of the frame and working down, include the non-original flippers, the flipper drag wear by the 10,000 insert, the chipping of the 4 insert, the complete destruction of the 8 insert surface, and the chipping of the 40X and 60X bonus inserts. There is also some wear around the 3 insert.
Initially, I was not going to do a major playfield restoration on this game. But looking at the damage here I knew I would have to do something about it. Especially bad is the 8 insert. The only way this game would ever play even reasonably well would be to fill in the damaged insert and sand it flush with the surrounding playfield. To a lesser extent, the same is true for the 40X and 60X inserts. The top layer of clearcoat, the artwork, and indeed some of the plastic insert itself are missing. And in this area between the slingshots and flippers, that is going to have a major effect on the ball. So it has to be fixed.
Given that I'm going to have to at least fill and level these, and that really the damage is almost entirely in areas that are either unpainted or black, I thought about it some more and decided that I might as well get out the paints and brushes and touch up the damaged areas. It is only a little bit more work, and it will look a lot better.
 |
 |
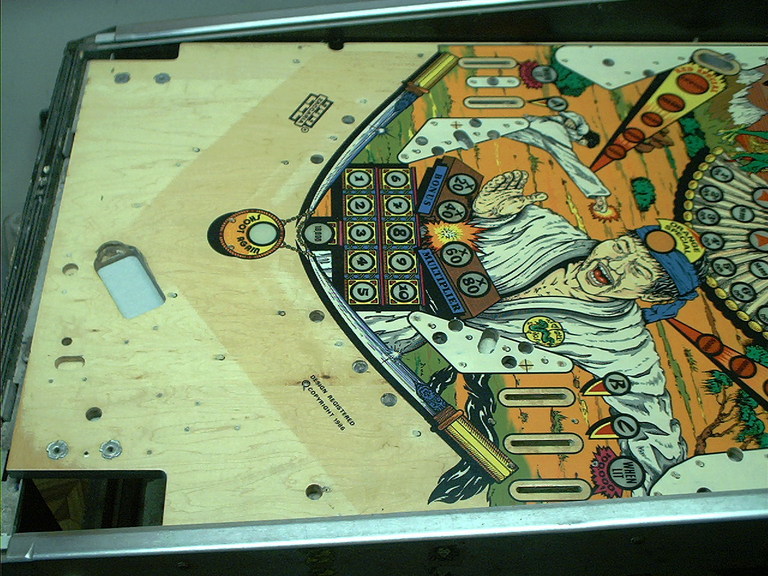
I stripped the remaining parts from the top side of the playfield. That it was dirty was obvious, but the picture shows just how dirty it was. The clean spots under the playfield apron from where parts were removed, and the handprints from flipping the playfield over and back again show just how dirty it was. The left side in the second picture above has been cleaned off somewhat.
 |
 |
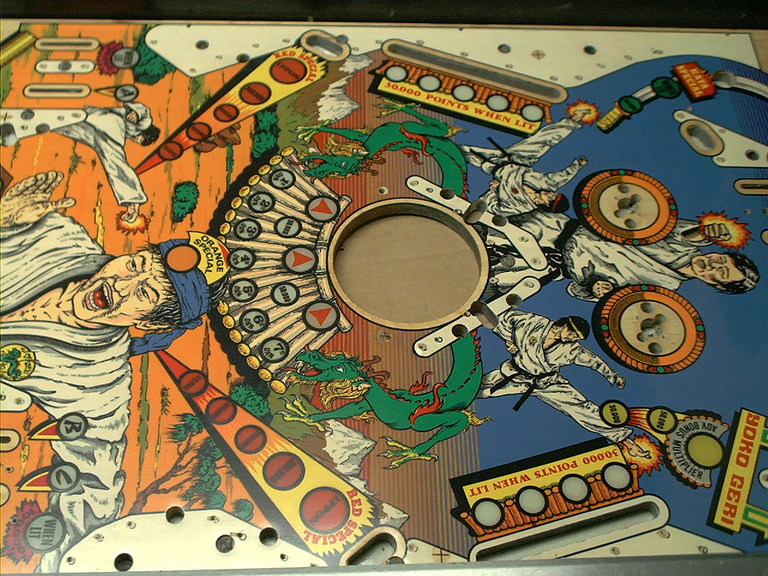
While contemplating the touchups to the lower playfield, and after stripping off the remaining top side parts, more problem areas emerge. The area around the pop bumpers is dirty, but is also pretty well hammered by the ball. There is some minor insert damage, again just in black areas. The upper arch area has wear from where the ball enters the playfield from the habitrail, and insert area wear into the artwork. The more I thought about it, the more it looked like this playfield was going to need a lot more work than I had planned on. Oh, well, that's what keeps things interesting with old pins; you never quite know what you're going to find.
So, the plans changed. I'll do the artwork touchups, then clearcoat the whole playfield to seal in and protect the surface from future damage. The only remaining parts, the wire ball guides, were removed, and restoration got underway.
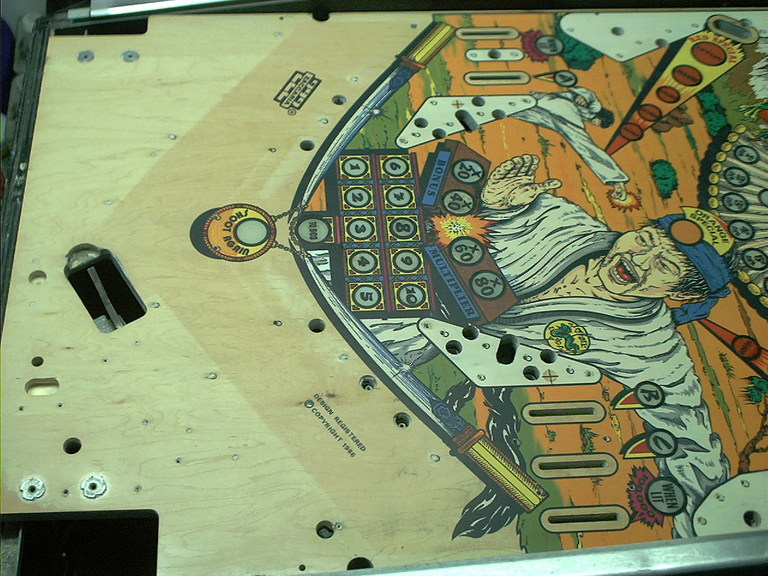
 |
 |
| Lower Playfield Touchups | Upper Playfield Touchups |
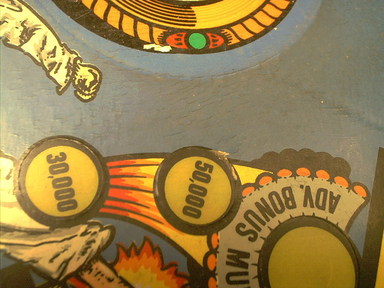
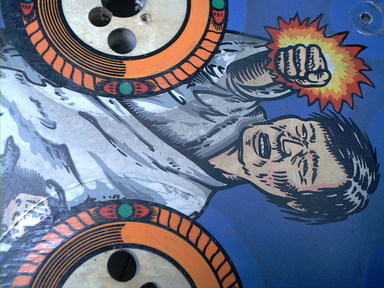
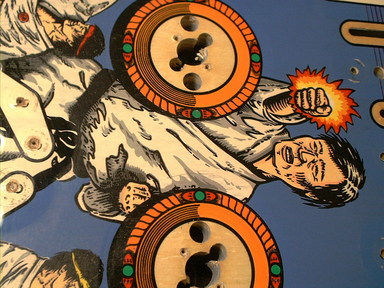
After a good cleaning, I repainted the black areas by hand with a fine brush and artists acryllic paints. Around those, some of the coloured artwork also needed to be repaired, including the brown plank artwork around the 40X and 60X inserts, the black/red/orange/yellow explosion by the 60X, the yellow, black, and red artwork around the 3, 4, 8, and 9 inserts, some of the green and black over blue between the bonus inserts, and the black, white and grey by the 10,000 insert.
Up top, the red, yellow, green, blue, and purple touchups to the ball arch area took a while. This area is mostly hidden under a large vacuum formed plastic when the game is assembled, so even though they aren't perfect, they also will not be very noticable.
 |
 |
| Pop bumper area, before | Pop bumper area, after |
No artwork touchups or clearcoat here, yet, just elbow grease and cleaners. My original plan was just to clean and polish the playfield. I was going to use these pictures, before and after of the same area, to show what a good cleaning and polishing can do. I have been asked many times if my games are clearcoated when people see them, and the answer is (generally) no. Oh, well. This one will be, but the pictures were too good not to use. This area was cleaned first with some Naptha and a rag to remove the grime and grunge, then cleaned with Novus #2 plastic polish and some rags. After that, I rubbed it out with some No. 7 White Polishing Compound, followed up with more Novus #2. Normally, my next step would be to wax it, but since this playfield is going to be clearcoated, I didn't do that.
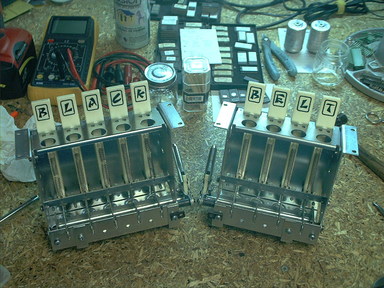 |
| B-L-A-C-K and B-E-L-T drop target banks, after restoration |
While the touchups are underway, it's time to work on the playfield mechanisms. I disassembled and cleaned the parts of the drop target banks. The target faces were pretty beat up, so this is the second time I have repainted the artwork by hand. The first was on Soccer Kings, and that has been holding up well, so I decided to do it again. I used some Krylon "Fusion" spray paint, meant for painting those Little Tykes big outdoor plastic toys. By spraying some of it in a cup and using a fine paintbrush, I was able to fill in the lines from the original hot stamp with new black paint.
 |
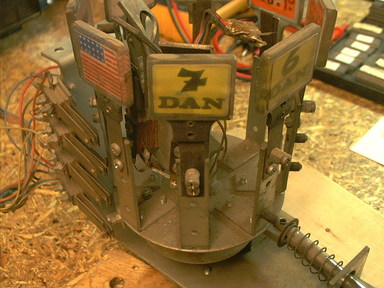 |
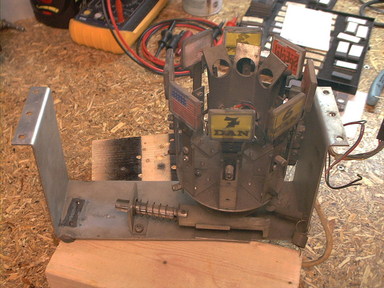
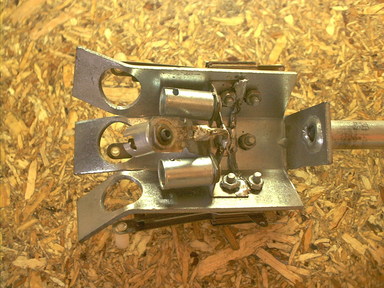
| Rototarget Assembly | |
 |
 |
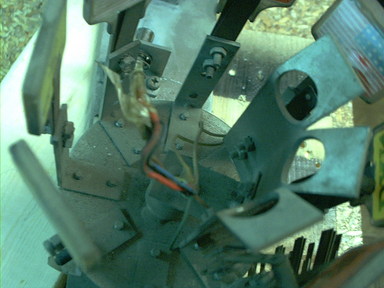
| Rototarget: Missing lamp sockets | Rototarget: Broken return spring |
The rototarget assembly had a few problems, including missing the lamp sockets that are supposed to illuminate it, and the broken return spring. And some of the targets had been swapped in from a Devil Riders, probably to replace broken ones, and several of the others were working on breaking off as well. Some spelunking in the local hardware store turned up a spring of approximately the right strength, and I pulled some lamp sockets out of the spare parts box from a parted out playfield. Those were the easy parts to take care of.
I found out later why the lamp sockets had been cut and removed. There is a setscrew on the unit that holds the centre tubular shaft in place. This shaft holds the lamp sockets and switches, allowing the targets to rotate around it, and the wiring for all this runs up through the centre. The setscrew is long enough that it pierced the wiring harness, even through the insulating wrap that is supposed to protect it, and created an intermittent short circuit. I blew several fuses before finding this.
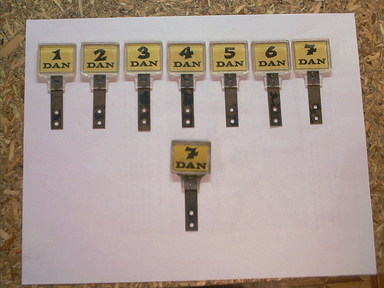
I got some targets images, and between those and pictures from the ones that weren't missing, re-drew the artwork (you can download a copy of the repro sticker artwork from the Artwork Reproductions page) for the target faces. This was printed out on plain paper. Using a Xyron laminator to put a layer of adhesive on the front side, and putting some mylar on the back to protect them, I now had stickers for the artwork. From another spare parts box from a parted out playfield to a World Cup '90, I had eight clear targets that had stickers on them for artwork. I peeled of the World Cup '90 stickers, cleaned up the targets and wet sanded the fronts with 1000 grit paper to smooth them before polishing with Novus, then stuck my own artwork on the back sides. Presto! Nice new targets. I later did the same thing with the two Ippon Red Special targets on the sides.
 |
 |
| Rototarget: Making new targets | Rototarget: Lamp sockets |
 |
|
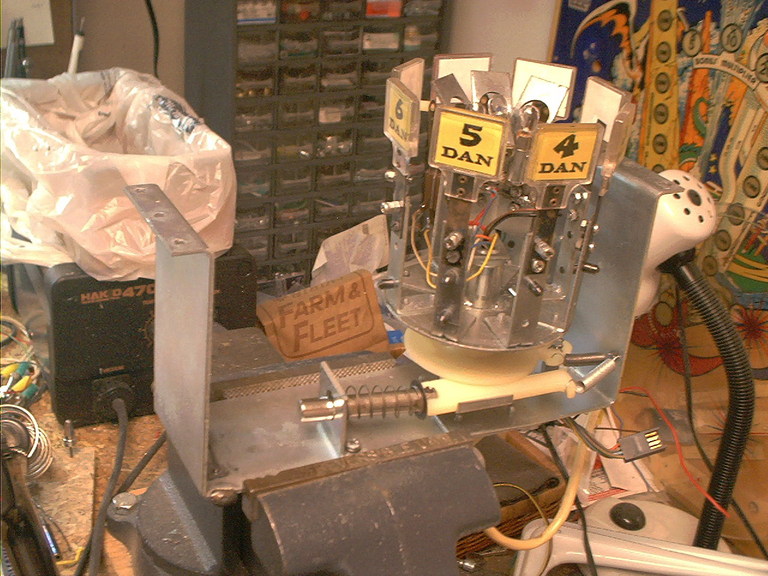
| Rototarget Assembly: Restored | |
 |
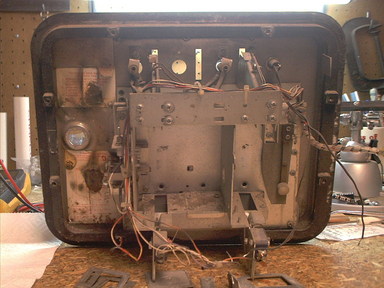 |
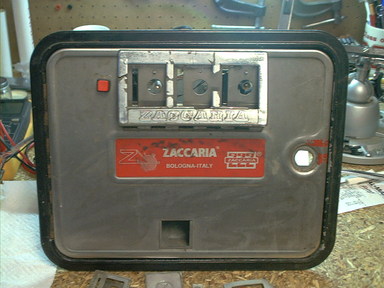
| Coin door: Front | Coin door: Back |
 |
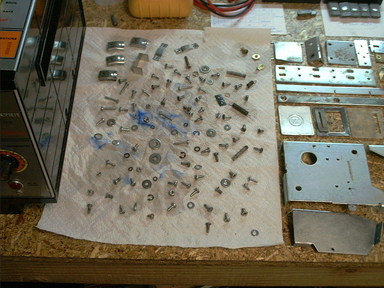 |
| Coin door: Parts! | |
 |
 |
| Coin door: Ready to put back together | Coin door: Reproduction stickers |
 |
 |
| Coin door: Front | Coin door: Back |
The coin door got the usual disassemble, clean everything, and replace the stickers on the inside treatment. I like a nice looking door. Fortunately, I had a replacement coin bezel for it, though the original (broken) one will likely be restored and used on another game someday. You can download the repro sticker artwork from the Artwork Reproductions page.
 |
 |
 |
| Playfield Top, Centre, and Bottom |
Touchups complete, the playfield surface has been scuffed with a Scotchbrite pad and prepared for clearcoating with Varathane.
 |
 |
 |
| Playfield Top, Centre, and Bottom after clearcoating with Varathane |
 |
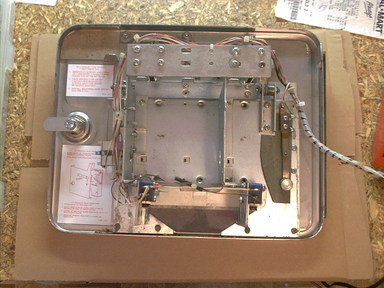
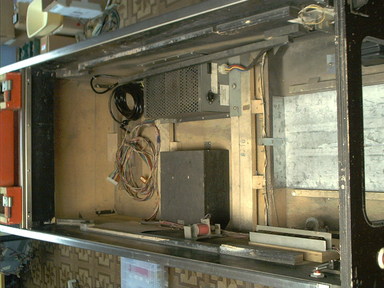 |
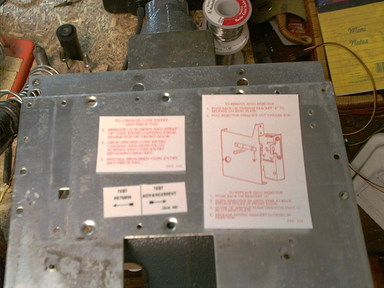
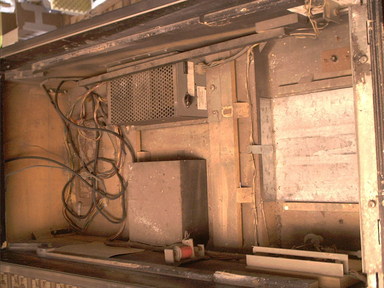
| Cabinet insides, before and after | |
Inside was as dirty as everywhere else. After a good cleaning, and with a new power cord installed, it looks much better. I also replaced the flipper button switches, and fabricated a little metal cover to hide the hole from somebody's installation of a "credit" button on the bottom side.
 |
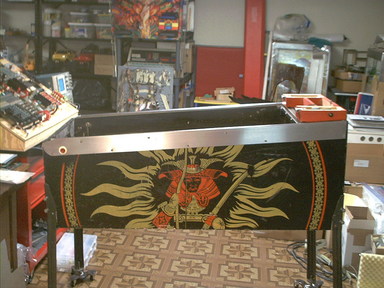 |
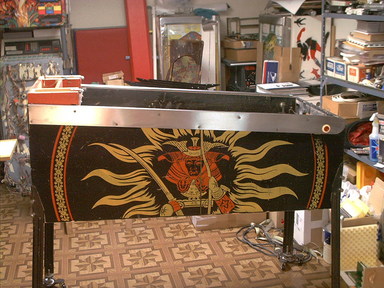
| Cabinet Left | Cabinet Right |
 |
 |
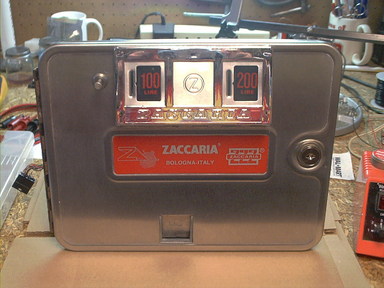
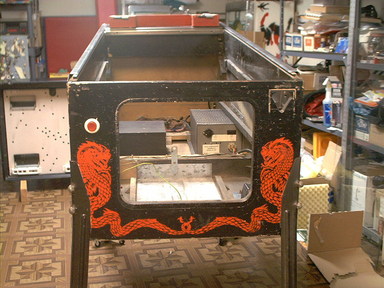
| Cabinet Front | Cabinet Front, with Door and Plunger Reinstalled |
 |
 |
| Backbox Left | Backbox Right |
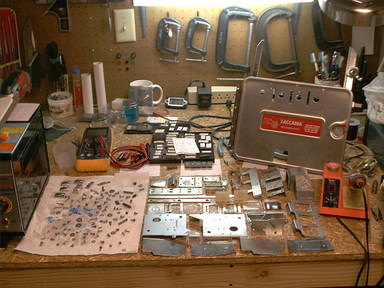
With the cabinet cleaned up, and up on some legs, it's starting to come together, but there is still a lot of work to be done. These are my "shop" legs that I use on whatever game I'm working on. For this game, I took a set of used Williams brass legs, primered them, and painted them gloss black.
 |
| Playfield being reassembled |
After letting the playfield clearcoat cure, reassembly begins. Here, the playfield posts, ball guides, flipper mechs, drop target banks, rototarget, and pop bumpers have been reinstalled. All of these parts have been cleaned, polished, or rebuilt while the clearcoat was curing.
 |
| Upper right plastic |
Here's the first stumbling block. Fortunately, it isn't a major one. The upper right playfield plastic had been replaced with something made by cutting up a plastic from some other game (unidentified). I was able to get a scan of the correct plastic (thanks, Joe), and created a reproduction of it.
After touching up the scanned artwork, and inverting the image, I printed it out using an inexpensive HP colour inkjet printer on some clear transparency film. The artwork is slightly smaller than the plastic, leaving a clear edge around it. I used the edge visible in the scan to cut a piece of PETG plastic to the right size and shape, then I put permanent adhesive on the non-printed side of the transparency film with a Xyron laminating machine. On the printed side of the transparency film, I used some adhesive white vinyl scavenged from a sign printing shop. Once this sandwich was ready, I trimmed the result so that the artwork wouldn't hide the clear edge, then affixed it to the bottom of the PETG plastic. After drilling the mounting holes, the result is ready to install on the playfield.
This worked so well that I reproduced the upper left plastic as well, since that one was cracked in a few spots, had been "repaired" by melting back together with a soldering iron, and had lost some of the artwork in the process.
 |
 |
| Playfield with rubber... | ...and plastics |
With some nice fresh white rubbers installed, and the playfield plastics reinstalled, this game is starting to look pretty nice. Closeups of the two reproduced playfield plastics:
 |
 |
| Upper left plastic | Upper right plastic |
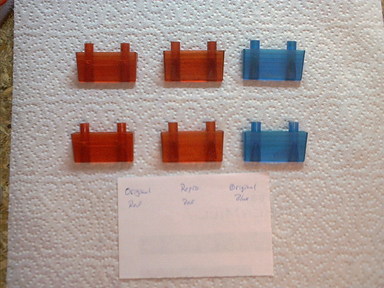
As I was putting the playfield rollover ball guides back in place, I found that one of them was completely broken at the mounting post for the screw, and the others weren't in much better shape. Initially, I thought this wouldn't be a big deal, I'd just find somebody parting out a playfield and get them from him. That's when I discoverred that while Zaccaria did use these rollover guides on other games, they normally used them in blue. They only used red ones on Blackbelt, and Space Shuttle. No parts games available here. So... Having already reproduced several translucent plastic parts (flipper bats, flipper caps), and having all the supplies on hand, I made a mold of a good guide from a parted out Soccer Kings, and proceded to reproduce the red ball guides I needed. (If you need red, or blue, ball guides, I now have them available as reproductions from the Parts For Sale page.)
 |
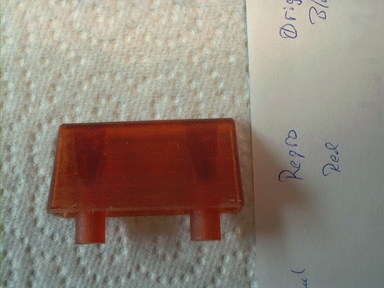 |
| Ball guides | Closeup of reproduced ball guide |
On the left are two of the original guides. The third has one of the mounting posts broken completely off. These two are complete, but both show cracks in the plastic. Two of the reproductions are in the middle. And there are two good ones from a Soccer Kings on the right. The closeup shows what the reproduced guide looks like by itself.
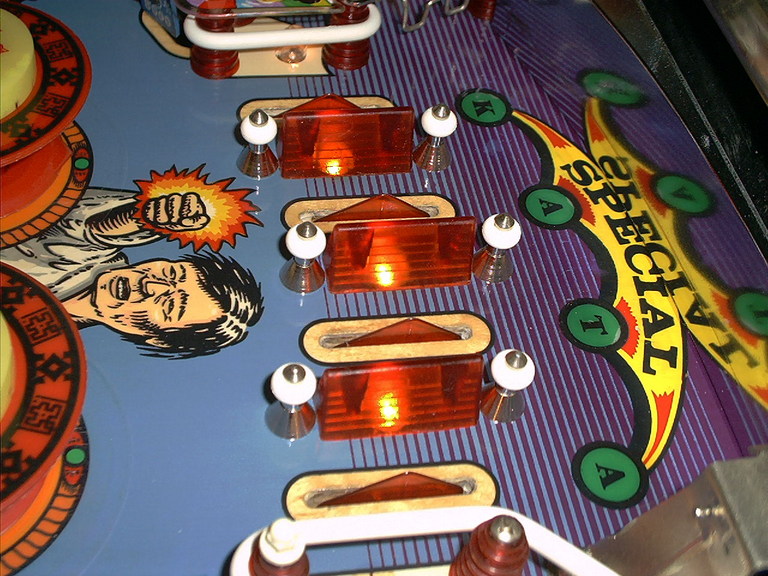 |
But who cares what they look like sitting on a paper towel on my workbench. Here's what they look like installed in the game, and lit up from below. The metal posts have been polished on my buffing wheel.
Having already reproduced the red translucent flipper bats and caps, and having the required flipper shafts made, those ugly generic white flipper bats were easily replaced by correct repro pieces.
 |
 |
 |
|
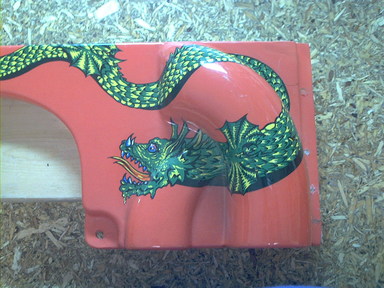
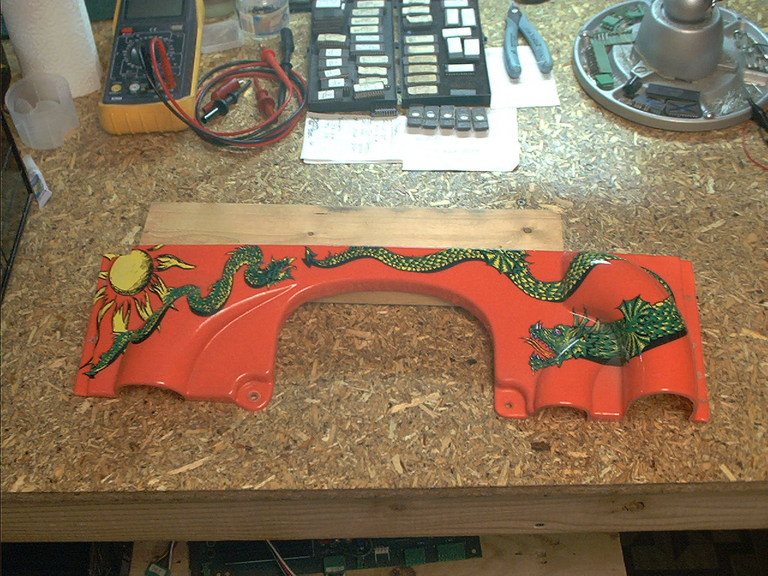
| Top plastic after repairs | |
This plastic had the mounting ear broken off on one side, the mounting ear cracked on the other side, and a chunk missing from the back right corner. I repaired the missing area by backing it with a chunk of PETG plastic attached with Liquid Nails for Small Projects glue, then using Squadron Green plastic putty to fill in the area. Once the putty was hardened and hand sanded to shape, I airbrushed the repaired area red to blend it in with the plastic. I also touched up a scratched area (you can see it on the shot showing the inside) in the dragon artwork.
And now, for the pièce de résistance, I had to do something about that broken vacuum formed plastic that covers the rototarget. Originally, I had been hoping to find a parts game or somebody that had one from a game they had parted out. After a few months of searching, I came to the conclusion that this wasn't going to happen. A while back, I had read Clay's guide to vacuum forming pieces (Vacuum Forming Plastic Coin-Op Game Parts) to make a space shuttle he needed for an old coin-op game. I went back and re-read this, traded email with Clay for a while, and decided to give his methods a shot. I also read up on people using similar techniques to make various Star Wars costume parts, especially "Storm Trooper" suits.
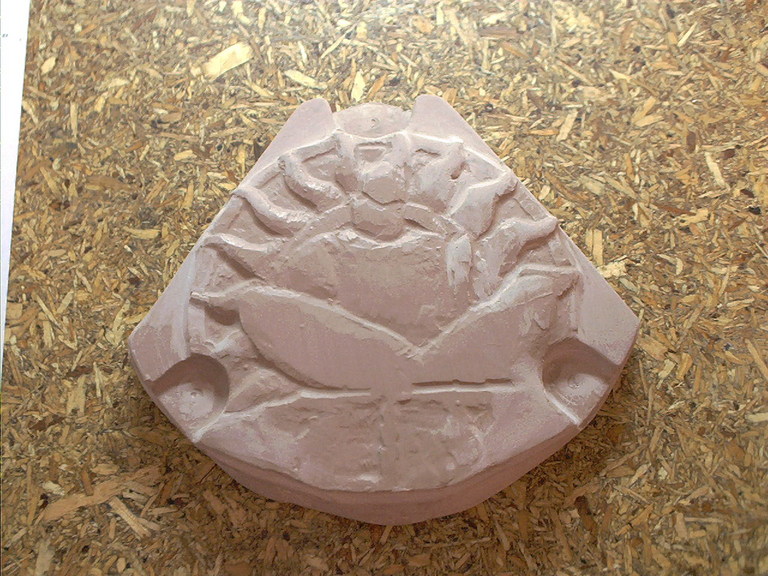 |
To start, a mold has to be made. I borrowed what I thought was going to be an unbroken plastic from another collector (thanks, Joe), but which turned out to be just broken in a different way. His was slightly better to make a mold from, though. I taped off the broken and missing parts, and following Clay's instructions, used Bondo to fill it. I deviated from Clay's instructions though, and used a proper mold release agent (xxxx 300, available from Eager Plastics). So when done, the mold pops right out of the original with no problems. I actually made the mold a couple of times, until I was happy with the results. Some sanding was needed to fix the areas that were missing on the original. The result is shown above.
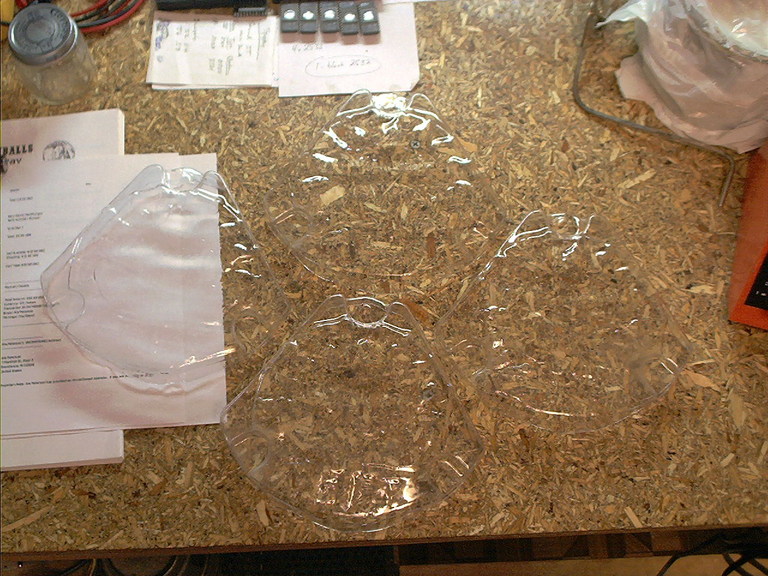 |
Next, a 4'x8' sheet of .060" PETG plastic was cut in to 22" x 24" sections (the biggest I could fit in my oven), and a vacuum formming rig was built, more or less following Clay's guide. I changed his design a bit, hoping to enhance the vacuum applied around the form, but I don't know if that actually mattered or not.
In to the oven went my jig and sheets of plastic. Out popped these nice, clear, replicas of my mold. No two are exactly identical, but this isn't a high-precision part, so that's ok. Maybe with more practice I could get them to be closer to identical, but I made 10, thinking that would probably be plenty, since I only needed to end up with one or two of them. Ideally, I'll end up with one for me, one for Joe for loaning me his to work from, maybe one or two more in case anybody needs one in the future.
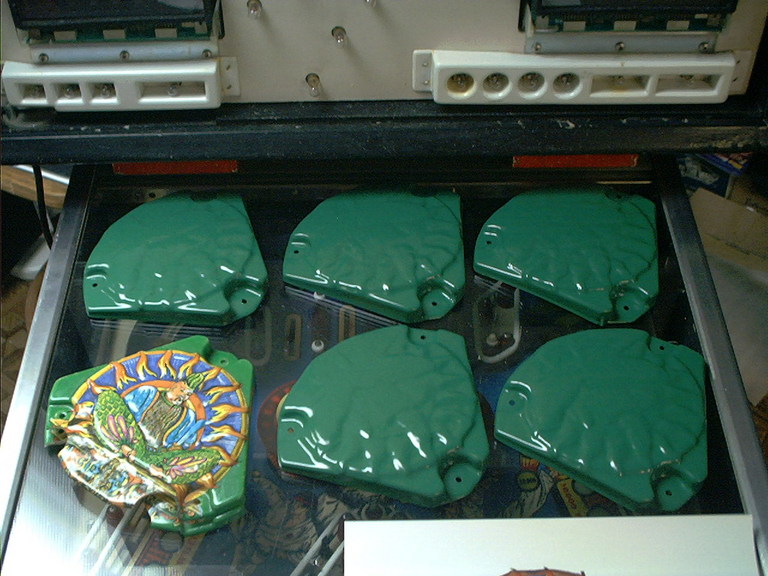 |
I took five, holding five in reserve, and painted them green. I used Krylon's "Fusion" paint meant for plastics, thinking that it would have the best chance of adhering and looking right. Their green was also a good match for the original plastic's colour. Unlike Clay's guide, I painted the outside, since the decal I'm going to use is extensive.
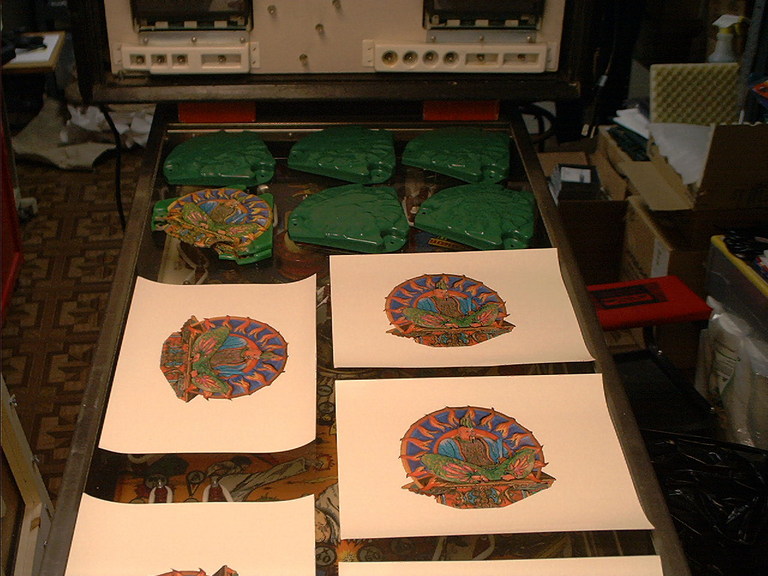 |
Following Clay's guide again, I used the white decal paper. I spent a month or so combining a scan of the artwork from my broken plastic, with a scan of the other collector's broken plastic, and some pictures of a non-broken one from another collector. I also had to re-draw some of the missing artwork. The result was printed out on the white paper, since there is white in the artwork, and my HP inkjet can't print white.
The final artwork I used is here.
 |
 |
After some experimentation with the five I had painted, and the decals, I achieved satisfactory results. The hard part is getting the decal to lay down on the uneven surface of this particular plastic. Clay's guide was written for a simpler piece where the sides are basically flat. I didn't have that luxury here. I used some plain white vinegar to help soften the decal film, and a collection of Q-tips and my fingers to press the decal down in to the surface of the plastic, working it as the adhesive set to get it to stick down in to the valleys. This wasn't perfect, and I did get a few tears in the ink on the decal, but those could be touched up with a fine paintbrush and a little bit of paint. The area around the front two mounting screws just would not stretch enough to lay down, so I ended up cutting away the artwork around that area until it looked good.
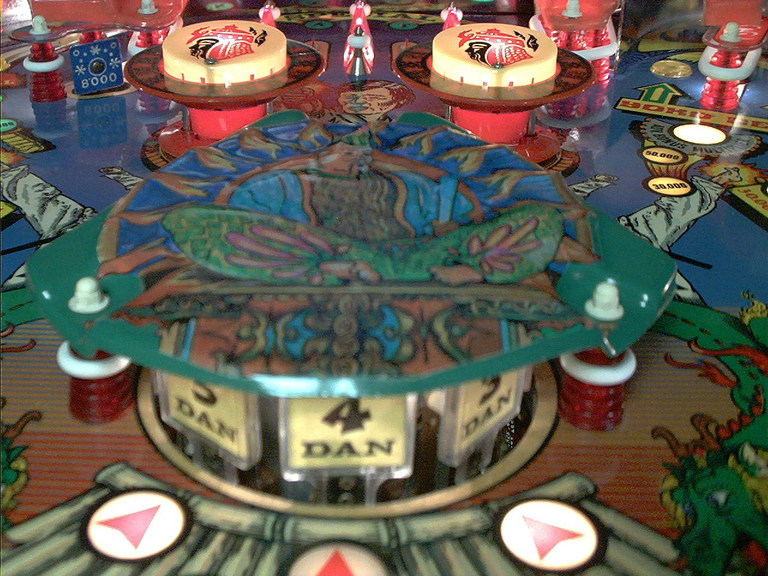 |
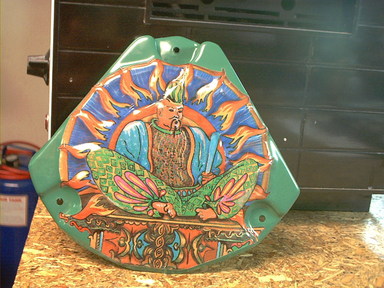
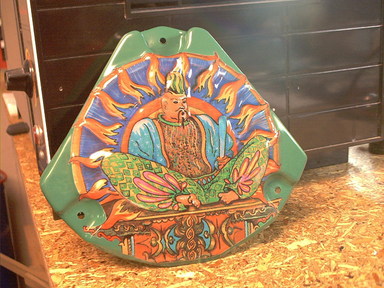
| Rototarget plastic repro installed |
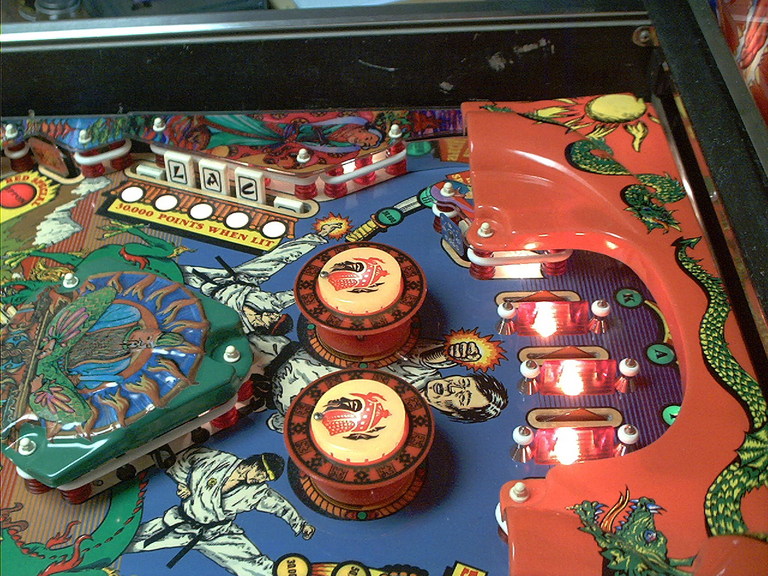
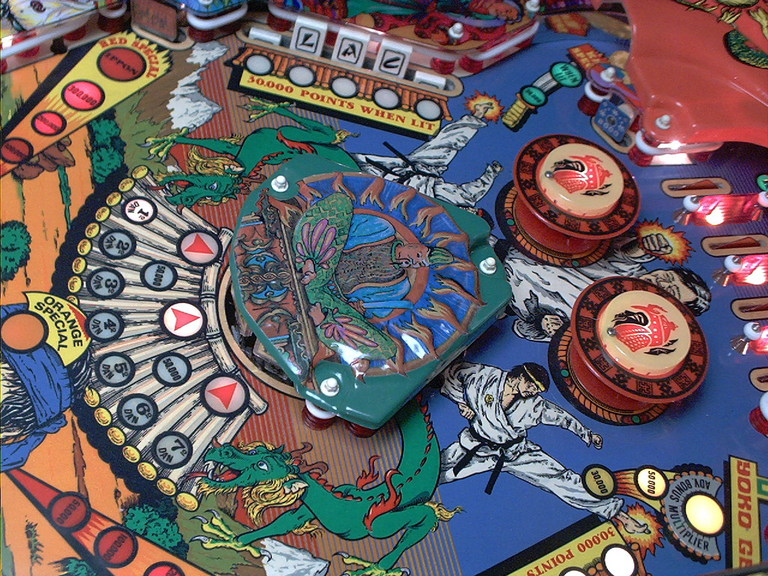 |
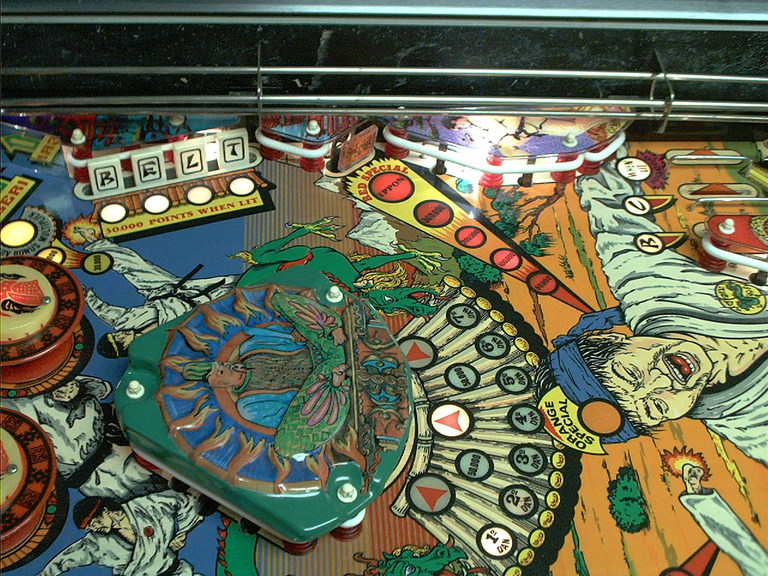
| Playfield Detail: Repro rototarget plastic |
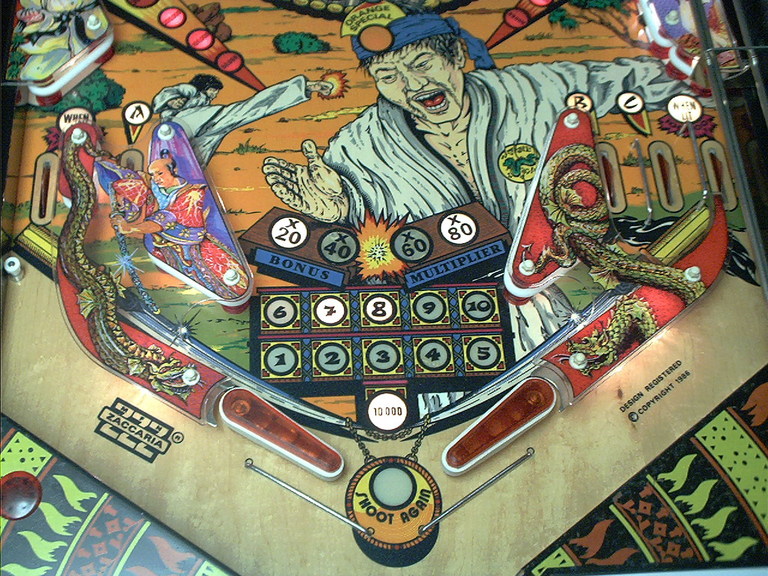 |
| Playfield Detail: Repaired and touched up bonus inserts |
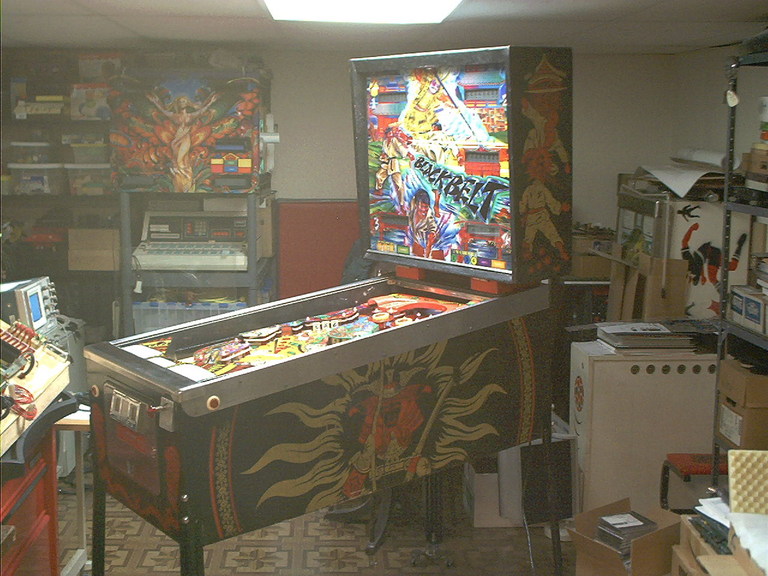 |
| Game Overall |
 |
| Playfield |
 |
| Backglass |
 |
| Playfield: Top |
 |
| Playfield: Middle |
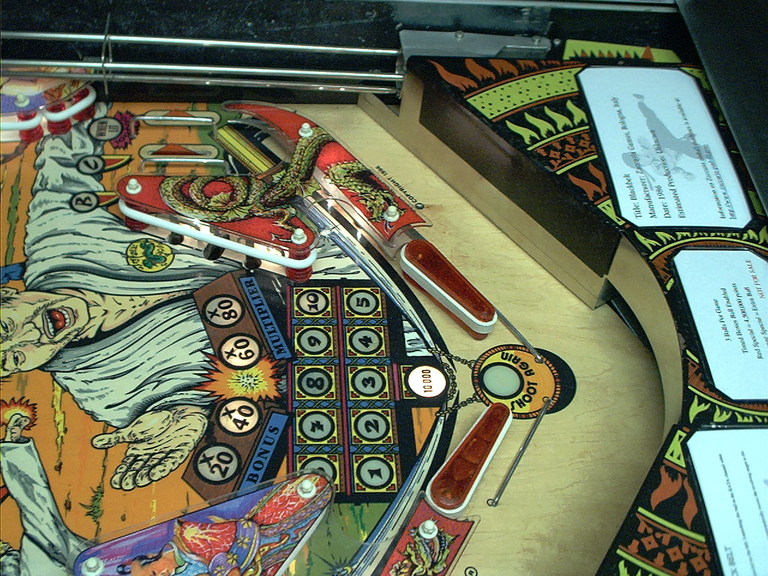 |
| Playfield: Bottom |
 |
| Playfield: Top | 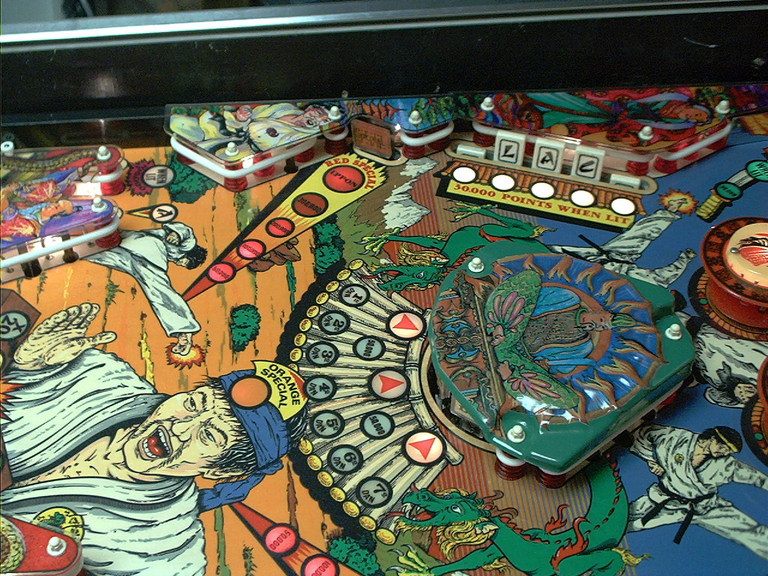 |
| Playfield: Middle | 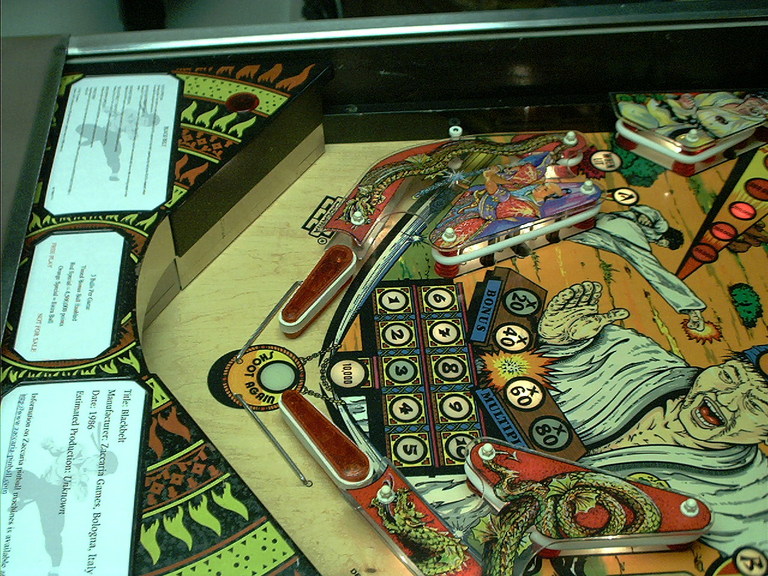 |
| Playfield: Bottom |
Restoration complete: 15 October 2007.