


Required:
Suggested:
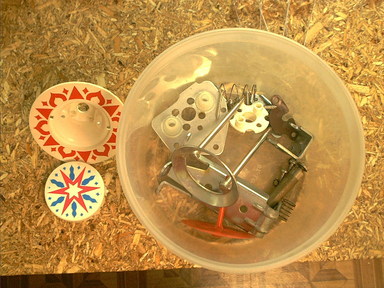
Parts:
Slightly more difficult than a slingshot, and more time consuming, but still well within the grasp of anyone familiar with some basic hand tools. The only really tricky part of this job is that some parts are above the playfield, and others are below it, so you will have to work on both sides. Prop the playfield securely so it doesn't fall while you're working on it.
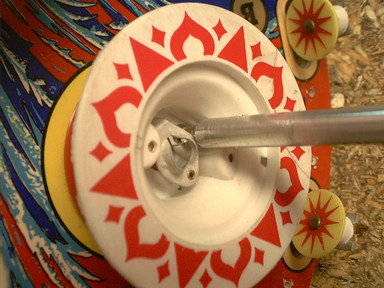
| Starting point, below the playfield. |
| Start by using the nutdriver to remove the two Nylock nuts that hold the Rod-and-Ring to the yoke. |
| Then remove the three Phillips head screws that hold the coil and bracket to the playfield. This allows the bracket, coil, and plunger and yoke to drop free from the playfield. |
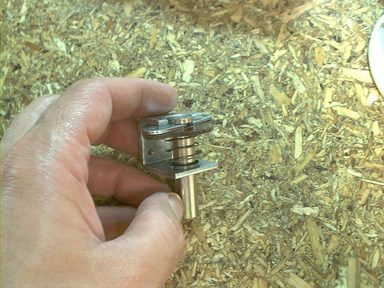
| Above the playfield, now, remove the two Phillips head screws that hold the pop bumper body to the playfield. |
| Gently pull the bracket and yoke free. |
| Cut the two lamp wires, clipping them as close to the solder point as possible. |
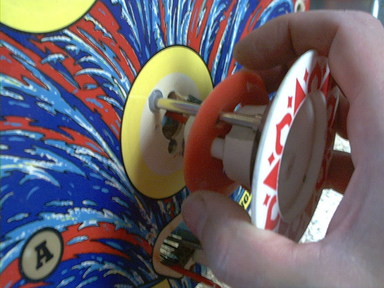
| Above the playfield, grasp the pop bumper body and rod-and-ring... |
| ...and gently pull it free. It may hang up on the solder points for the lamp socket where they go through the playfield, just work them loose, or clip them shorter if needed. |
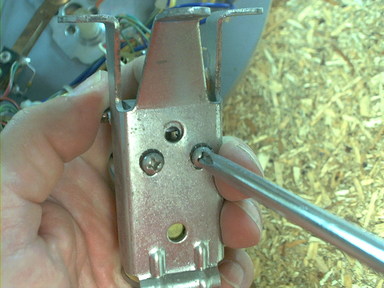
| Grab the bracket and hold it in one hand. |
| Then remove the two screws that hold the plunger bracket to the pop bumper bracket. |
| With the screws out, the bracket, plunger, spring, and yoke can be removed. |
| Remove the coil sleeve and discard it. You may find an original brass one, like this, or you may find a nylon one. In either case, replace with a new one when reassembling. |
| Remove the plunger, spring, and yoke pieces from the bracket, then remove the yoke and spring from the plunger. If the metal or fibre yoke pieces are broken, replace with Pinball Resource part numbers GTB-A2662+ and GTB-A12149. |
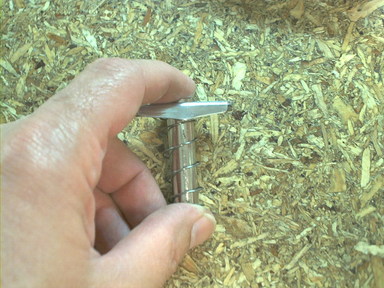
| Check the plunger for mushrooming, where the chamfered end gets beaten against the coil stop. This one has mild mushrooming. It is still usable and will be fixed up with a file. |
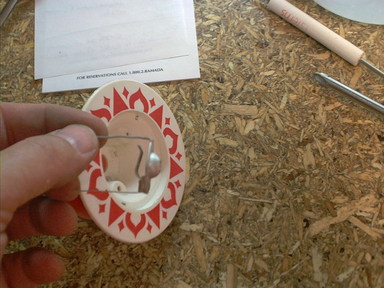
| Remove the two screws that hold the spoon switch in place. Note that they are slightly smaller than the three screws that hold the pop bumper coil bracket in place, and be careful not to mix them up. |
| Disassembly of the body starts by removing the four plastic insulators from the lamp socket. Save these for later, or replace with heat shrink tubing during reassembly if they are badly damaged or missing. |
| Remove the lamp socket and discard it. Replace with a new one during reassembly. |
| Remove the base. |
| Remove the centring spring. |
| Remove the skirt. |
| Remove the rod-and-ring assembly. |
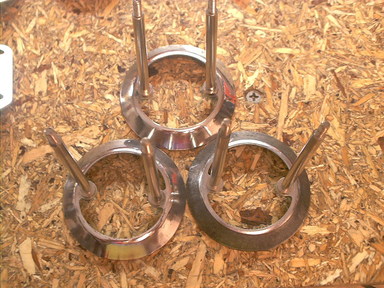
| After cleaning and waxing the playfield, install new adhesive backed Mylar trim platters to protect the playfield. Do NOT use the non-adhesive ("Gottlieb" style) ones, as they allow dirt and junk to accumulate underneath and turn in to the equivilent of sandpaper over time. Here, the three rings are shown in position with the backing paper still on. |
| Everything except the body and cap goes in the Bucket-O-Parts to be cleaned. Clean everything. I like Castrol SuperClean for the parts, and Simple Green for the body and cap. Clean and dry all parts. |
| This step is not strictly required, but do it anyway. Once the Rod-and-Ring assemblies are clean, use a buffing wheel and some rouge to polish the ring. This not only looks better, but it leaves a smoother surface on the ring and gives better pop bumper action in game play. |
| The one on the right has not been polished yet, for comparison. |
| All parts, clean and ready for reassembly. Fix the plunger mushrooming by filing the chamfer with a file as needed. Inspect the yoke for breakage or cracking and replace as needed. Replace the return spring if needed as well. |
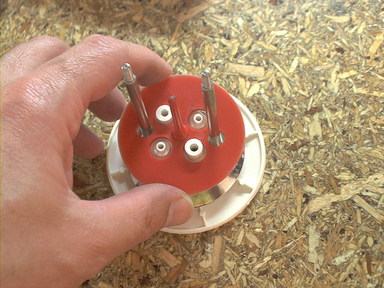
| Install the Rod-and-Ring on the body. |
| Install the skirt. |
| Install the centring spring. |
| Install the base. |
| Install the new lamp socket. |
| The body is now ready for reinstallation. |
| Reassemble the fibre yoke on the plunger... |
| ...and the metal yoke... |
| ...and the return spring. |
| Reinstall the plunger/yoke/spring combination in the bracket. |
|
Two spoon switches, before cleaning. Note the grunge. This leads to lousy pop bumper performance, as the skirt has to move through this gunk to get the switch to close. Clean with SuperClean and a paper towel or rag. |
| Cleaning the spoon. This paper towel was clean when I started. | |
The resulting, clean, spoon switches. |
| Clean the contact points on the spoon switch with a business card while you have it out where it is easy to get at. |
| Reinstall the pop bumper baseplate in the playfield. Note that the top (that goes up through to the playfield surface) is different from the bottom and install correctly. The edge of the plastic at one end has a ridge around it, this goes up. |
| One screw for the baseplate. It is the same size as the two for the spoon switch, and smaller than the three for the solenoid bracket. |
| Reinstall the spoon switch and its two screws. |
| Install a new nylon coil sleeve. Note that the end with the flange goes on the end of the coil away from the lugs. |
| Put the coil back on the bracket, making sure that it seats all the way down against the coil stop. |
| Install the plunger and its associated bracket and parts. Hold this assembly tightly down against the coil with one hand. |
| Install the screws that hold the plunger bracket to the solenoid bracket. |
| Top side of the playfield, reinstall the assembled body. |
| Install the two screws to hold the body in place. |
| Back under the playfield again, install the four black plastic insulators on the lamp socket leads. The small two go in first, then the longer two go on top. Or replace with heathshrink tubing. |
| Adjust the spoon switch position, so that the plastic rod from the skirt is centred in the bowl of the spoon. |
| Bend the lamp socket leads over to keep the insulators in place and to provide a place to solder the wires to. Don't bend them all the way over so that they're touching the base. |
| Clip off the excess lamp socket leads, leaving about 1/4" of lead exposed. Tin the lead with solder. |
| Strip about 1/4" of insulation off of the wires for the lamp sockets, tin the exposed wire, then solder the wires to the lamp socket leads. |
| Reinstall the solenoid bracket, making sure to get the threaded ends of the Rod-and-Ring assembly through the holes in the yoke. |
| Install the three screws to hold the solenoid bracket in place. |
| Install the two Nylock nuts on the ends of the Rod-and-Ring. |
| Tighten the Nylock nuts down to hold the Rod-and-Ring to the yoke. Do not over-tighten these. |
And that's it. You're done. Now go do the other pop bumpers.
David Gersic info@zaccaria-pinball.com
Copyright © 2007. All rights reserved.
This document may be freely distributed so long as the content is not modified.